Go 语言的优势
为何选择 Go 语言
我们知道 Go 中,存在一个 defer 关键字用于修饰一个函数或者方法,使得该函数或者方法在返回前才会执行,也就说被延迟执行,但又一定会执行。但其实 Go 中也存在类似的异步,或者说多线程的概念,但在 Go 中不叫作线程,而是叫协程。
协程相对于线程来说,是一个非常轻量级的东西,它在一个程序中,可以启动很多个。协程也称为 goroutine。goroutine 被 Go runtime 所调度,这一点和线程不一样。也就是说,Go 语言的并发是由 Go 自己所调度的,自己决定同时执行多少个 goroutine,什么时候执行哪几个。这些对于我们开发者来说很透明,只需要在编码的时候告诉 Go 语言要启动几个 goroutine,至于如何调度执行,我们不用关心。
启动一个 goroutine 简单,Go 语言为我们提供了 go 关键字,相比其他编程语言简化了很多,如代码:
func main() {
   go fmt.Println("Hi,Elena")
   fmt.Println("I am main goroutine")
   time.Sleep(time.Second)
}
复制代码
这样就启动了一个 goroutine,用来调用 fmt.Println 函数,打印"Hi,Elena",所以这段代码里,其实有两个 goroutine,一个是 main 函数启动的 main goroutine,一个是通过 go 关键字启动的 goroutine。
也就是说,启动一个协程的关键字 go 即可,语法:
go 关键字后跟一个方法或者函数的调用,就可以启动一个 goroutine,让方法在这个新启动的 goroutine 中运行。运行以上示例,可以看到如下输出:
I am main goroutine
#待一秒的同时输出下面
Hi,Elena
复制代码
从输出结果也可以看出,程序是并发的,go 关键字启动的 goroutine 并不阻塞 main goroutine 的执行,所以我们看到如上打印。
上面分析了 Go 具有强大的 goroutine 来作为通信的并发协程,而且,Go 语言内部帮我们实现了这些 goroutine 之间的内存共享。执行 goroutine 只需要极小的栈内存。也正因为如此,可同时运行成千上万个并发任务。goroutine 比 thread 更易用、更高效、更轻便。
其实,选择 go 的另一个原因是:go 提供了强大的 websocket 组件。在 Go 中,websocket 协议的交互流程:
客户端首先发起一个 Http 请求到服务端,请求的特殊之处,在于在请求里面带了一个 upgrade 的字段,告诉服务端,想生成一个 websocket 的协议
服务端收到请求后,会给客户端一个握手的确认,返回一个 switching, 意思允许客户端向 websocket 协议转换,完成这个协商之后,客户端与服务端之间的底层 TCP 协议是没有中断的
客户端可以向服务端发起一个基于 websocket 协议的消息
服务端也可以主动向客户端发起 websocket 协议的消息
Go 语言的基础操作
上面讲了 go 中的并发以及通信 websocket 的协议交互流程,接下来,我们看看一些基础操作。比如,我们要进行 Websocket 的服务端的实现,那么需要依赖:"github.com/gorilla/websocket",而且,我们需要初始化连接,读、写信息,同时,还会存在关闭连接、关闭 channel。
首先,我们先来初始化连接:
import ( "github.com/gorilla/websocket" "sync" "errors" ) type Connection struct{ wsConnect *websocket.Conn inChan chan []byte outChan chan []byte closeChan chan byte mutex sync.Mutex isClosed bool} func InitConnection(wsConn *websocket.Conn)(conn *Connection ,err error){ conn = &Connection{ wsConnect:wsConn, inChan: make(chan []byte,1000), outChan: make(chan []byte,1000), closeChan: make(chan byte,1), } go conn.readLoop(); go conn.writeLoop(); return}
复制代码
这里定义了互斥锁,对 closeChan 关闭上锁,而且,还定义防止 closeChan 被关闭多次的属性。连接时,需要一些 channel。同时,连接后需要启动读、写协程。
我们先来看看读协程:
func (conn *Connection)readLoop(){ var( data []byte err error ) for{ if _, data , err = conn.wsConnect.ReadMessage(); err != nil{ goto ERR } select{ case conn.inChan <- data: case <- conn.closeChan: goto ERR } } ERR: conn.Close()}
复制代码
在读协程里,容易导致阻塞,阻塞等待 inChan 有空闲位置,而且,一旦 closeChan 感知需要断开 conn。接下来我们看看主要实现逻辑:
func (conn *Connection)ReadMessage()(data []byte , err error){ select{ case data = <- conn.inChan: case <- conn.closeChan: err = errors.New("connection is closeed") } return }
复制代码
那么对于写协程,也是一样的:
func (conn *Connection)writeLoop(){ var( data []byte err error ) for{ select{ case data= <- conn.outChan: case <- conn.closeChan: goto ERR } if err = conn.wsConnect.WriteMessage(websocket.TextMessage , data); err != nil{ goto ERR } } ERR: conn.Close() }
复制代码
写数据也是需要 channel:
func (conn *Connection)WriteMessage(data []byte)(err error){ select{ case conn.outChan <- data: case <- conn.closeChan: err = errors.New("connection is closeed") } return }
复制代码
在读、写过程中,可能会导致连接关闭:
func (conn *Connection)Close(){ conn.wsConnect.Close() conn.mutex.Lock() if !conn.isClosed { close(conn.closeChan) conn.isClosed = true } conn.mutex.Unlock()}
复制代码
这里利用互斥锁标记,确保让 closeChan 只关闭一次。
实战即时聊天系统
如何发送文字
其实发送文字,这些对于前端来说,就是对数据信息进行拼接。比如:前端用户 1 拼接好数据对象 Message
msg={id:1,userid:2,dstid:3,cmd:10,media:1,content:txt}
复制代码
转化成 json 字符串 jsonstr:jsonstr = JSON.stringify(msg),然后通过 websocket.send(jsonstr)发送。
这时,后端在 recvproc 中接收收数据 data,并做相应的逻辑处理 dispatch(data)-转发给用户 2,用户 2 通过 websocket.onmessage 收到消息后做解析并显示。
前端处理核心方法
在前端,所有的操作都在拼接数据,那么是如何拼接的呢?
sendtxtmsg:function(txt){//{id:1,userid:2,dstid:3,cmd:10,media:1,content:txt}var msg =this.createmsgcontext();//msg={"dstid":dstid,"cmd":cmd,"userid":userId()}//选择某个好友的时候对dstid,cmd进行赋值//userId()返回用户自己的id ,// 从/chat/index.shtml?id=xx&token=yy中获得//1文本类型msg.media=1;msg.content=txt;this.showmsg(userInfo(),msg);//显示自己发的文字this.webSocket.send(JSON.stringify(msg))//发送}
sendpicmsg:function(picurl){    //{id:1,userid:2,dstid:3,cmd:10,media:4,    // url:"http://www.baidu.com/a/log,jpg"}    var msg =this.createmsgcontext();    msg.media=4;    msg.url=picurl;    this.showmsg(userInfo(),msg)    this.webSocket.send(JSON.stringify(msg))}sendaudiomsg:function(url,num){    //{id:1,userid:2,dstid:3,cmd:10,media:3,url:"http://www.a,com/dsturl.mp3",anount:40}    var msg =this.createmsgcontext();    msg.media=3;    msg.url=url;    msg.amount = num;    this.showmsg(userInfo(),msg)    console.log("sendaudiomsg",this.msglist);    this.webSocket.send(JSON.stringify(msg))}
复制代码
后端逻辑处理函数
func recvproc(node *Node) {  for{    _,data,err := node.Conn.ReadMessage()    if err!=nil{      log.Println(err.Error())      return    }    //todo 对data进一步处理    dispatch(data)    fmt.Printf("recv<=%s",data)  }}
func dispatch(data[]byte){    //todo 解析data为message        //todo根据message的cmd属性做相应的处理    }
复制代码
对端接收到消息后处理函数
//初始化websocket的时候进行回调配置this.webSocket.onmessage = function(evt){     if(evt.data.indexOf("}")>-1){         this.onmessage(JSON.parse(evt.data));     }else{         console.log("recv<=="+evt.data)     } }.bind(this)onmessage:function(data){     this.loaduserinfo(data.userid,function(user){         this.showmsg(user,data)     }.bind(this)) }
 //消息显示函数showmsg:function(user,msg){    var data={}    data.ismine = userId()==msg.userid;    //console.log(data.ismine,userId(),msg.userid)    data.user = user;    data.msg = msg;    //只需要修改数据结构即可完成页面渲染    this.msglist = this.msglist.concat(data)    //面板重置    this.reset();    var that =this;    //滚动到新消息处    that.timer = setTimeout(function(){        window.scrollTo(0, document.getElementById("convo").offsetHeight);        clearTimeout(that.timer)    },100)}
复制代码
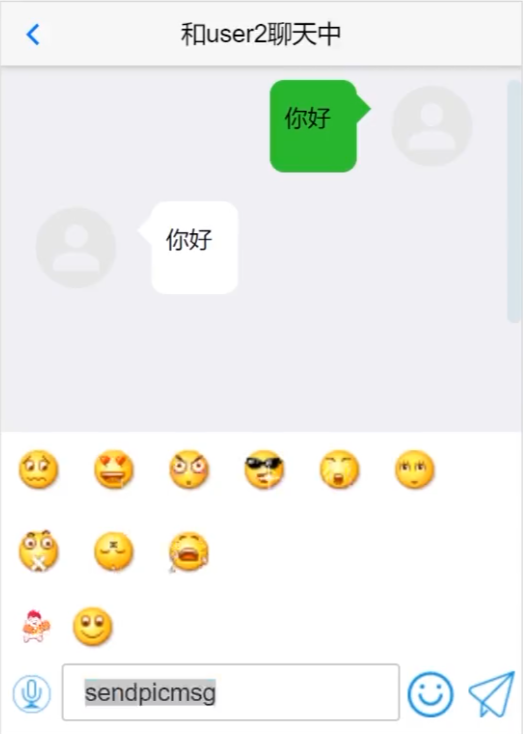
如何发送图片
点击加号,可以看到图片等图标,点击后,弹出一个窗口,选择图片,上传到服务器,获得一个链接地址后调用 sendpicmsg 方法开始发送流程。
那么,对于图片界面处理技巧
<input accept="image/gif,image/jpeg,,image/png" type="file" onchange="upload(this)" class='upload'/>
复制代码
在 upload 前端实现,sendpicmsg 方法开始发送流程
function upload(dom){ uploadfile("attach/upload",dom,function(res){ if(res.code==0){//成功以后调用sendpicmsg vm.sendpicmsg(res.data) } }) } function uploadfile(uri,dom,callback){ //H5新特性 var formdata = new FormData(); //获得一个文件dom.files[0] formdata.append("file",dom.files[0]) //formdata.append("filetype",".png")//.mp3指定后缀 var xhr = new XMLHttpRequest();//ajax初始化 var url = "http://"+location.host+"/"+uri; //"http://127.0.0.1/attach/upload" xhr.open("POST",url, true); //成功时候回调 xhr.onreadystatechange = function() { if (xhr.readyState == 4 && xhr.status == 200) { //fn.call(this, JSON.parse(xhr.responseText)); callback(JSON.parse(xhr.responseText)) } }; xhr.send(formdata);}
复制代码
那么对于 upload 后端实现,存储位置"./mnt",需要确保已经创建好,而且 url 格式"/mnt/xxxx.png",需要确保网络能访问/mnt/:
func UploadLocal(writer http.ResponseWriter, request * http.Request){ //todo 获得上传的源文件s    srcfile,head,err:=request.FormFile("file")    if err!=nil{     util.RespFail(writer,err.Error()) }
 //todo 创建一个新文件d suffix := ".png" //如果前端文件名称包含后缀 xx.xx.png ofilename := head.Filename tmp := strings.Split(ofilename,".") if len(tmp)>1{  suffix = "."+tmp[len(tmp)-1] } //如果前端指定filetype //formdata.append("filetype",".png") filetype := request.FormValue("filetype") if len(filetype)>0{  suffix = filetype } //time.Now().Unix()    filename := fmt.Sprintf("%d%04d%s",     time.Now().Unix(), rand.Int31(),     suffix)    dstfile,err:= os.Create("./mnt/"+filename)    if err!=nil{     util.RespFail(writer,err.Error())     return }
 //todo 将源文件内容copy到新文件 _,err = io.Copy(dstfile,srcfile) if err!=nil{  util.RespFail(writer,err.Error())  return } //todo 将新文件路径转换成url地址
 url := "/mnt/"+filename //todo 响应到前端 util.RespOk(writer,url,"") }
复制代码
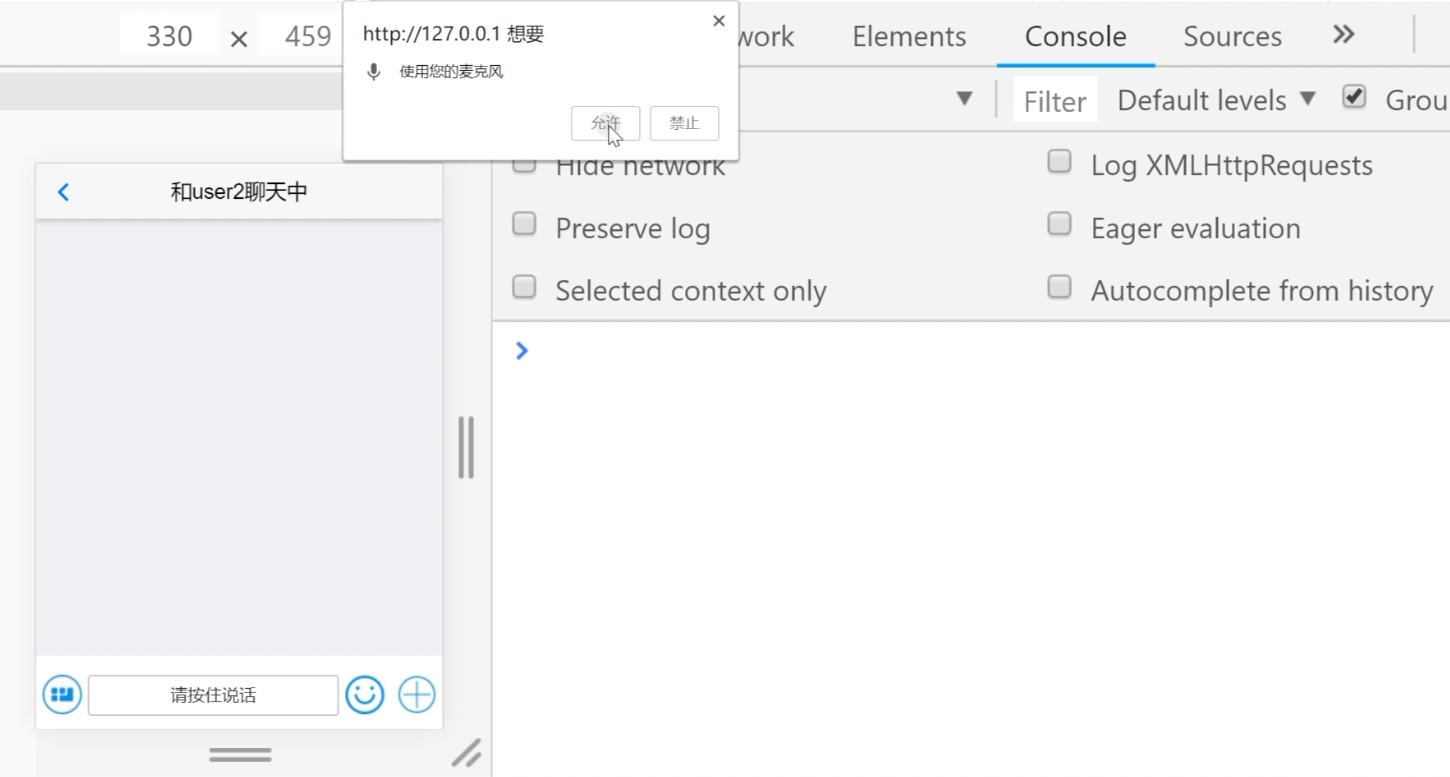
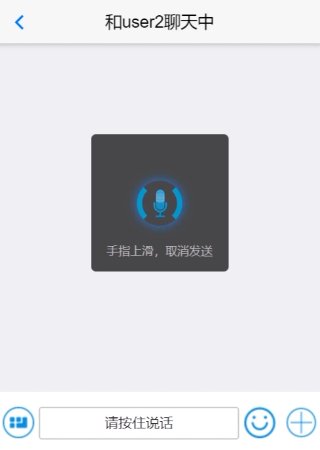
如何发送语音
在发送语音之前,需要采集语音:
navigator.mediaDevices.getUserMedia(    {audio: true, video: true}    ).then(successfunc).catch(errfunc);

navigator.mediaDevices.getUserMedia(    {audio: true, video: false}    ).then(function(stream)  {              //请求成功              this.recorder = new MediaRecorder(stream);              this.recorder.start();              this.recorder.ondataavailable = (event) => {                  uploadblob("attach/upload",event.data,".mp3",res=>{                      var duration = Math.ceil((new Date().getTime()-this.duration)/1000);                      this.sendaudiomsg(res.data,duration);                  })
                  stream.getTracks().forEach(function (track) {                      track.stop();                  });                  this.showprocess = false              }                        }.bind(this)).catch(function(err){                mui.toast(err.msg)                this.showprocess = false            }.bind(this));
复制代码
采集完成,将语音进行上传:
function uploadblob(uri,blob,filetype,fn){ var xhr = new XMLHttpRequest(); xhr.open("POST","//"+location.host+"/"+uri, true); // 添加http头,发送信息至服务器时内容编码类型 xhr.onreadystatechange = function() { if (xhr.readyState == 4 && (xhr.status == 200 || xhr.status == 304)) { fn.call(this, JSON.parse(xhr.responseText)); } }; var _data=[]; var formdata = new FormData(); formdata.append("filetype",filetype); formdata.append("file",blob) xhr.send(formdata);}
复制代码
如何实现即时聊天高并发
高并发方案
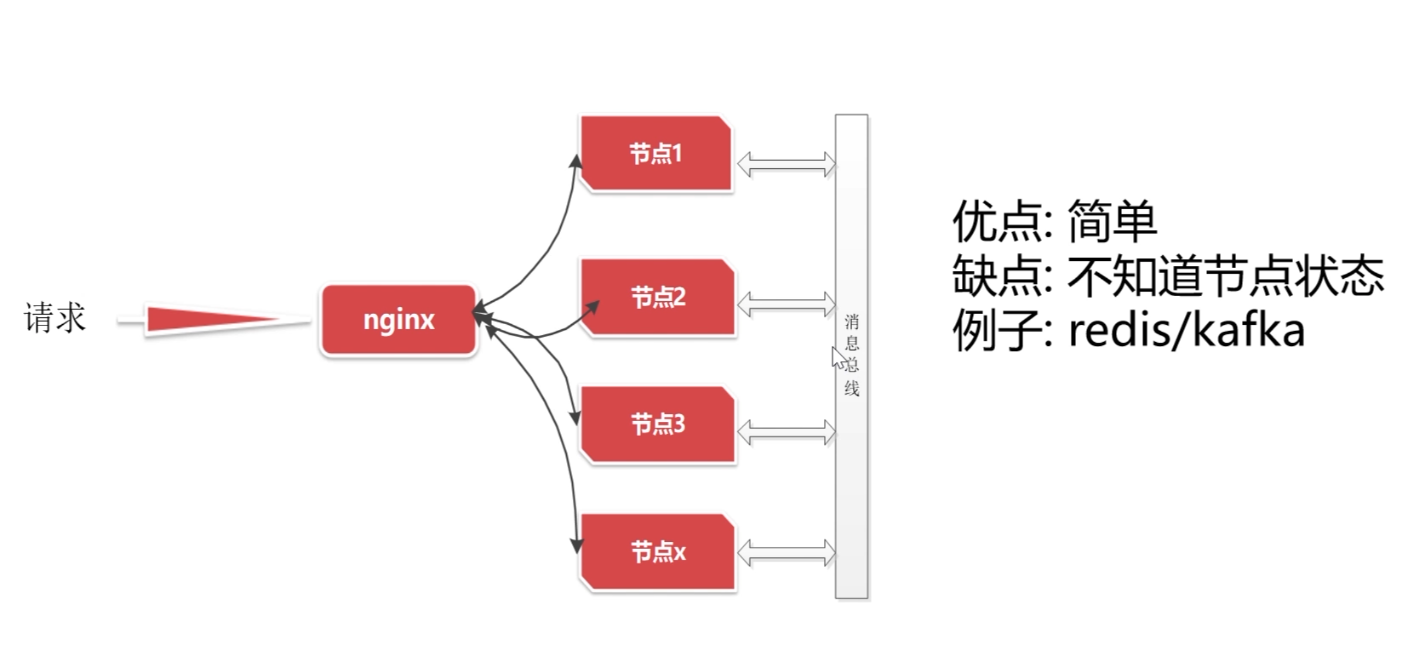
在前面也讲过了,对于即时通信,这种属于多对多的一个线程处理情况,那么需要性能优化。
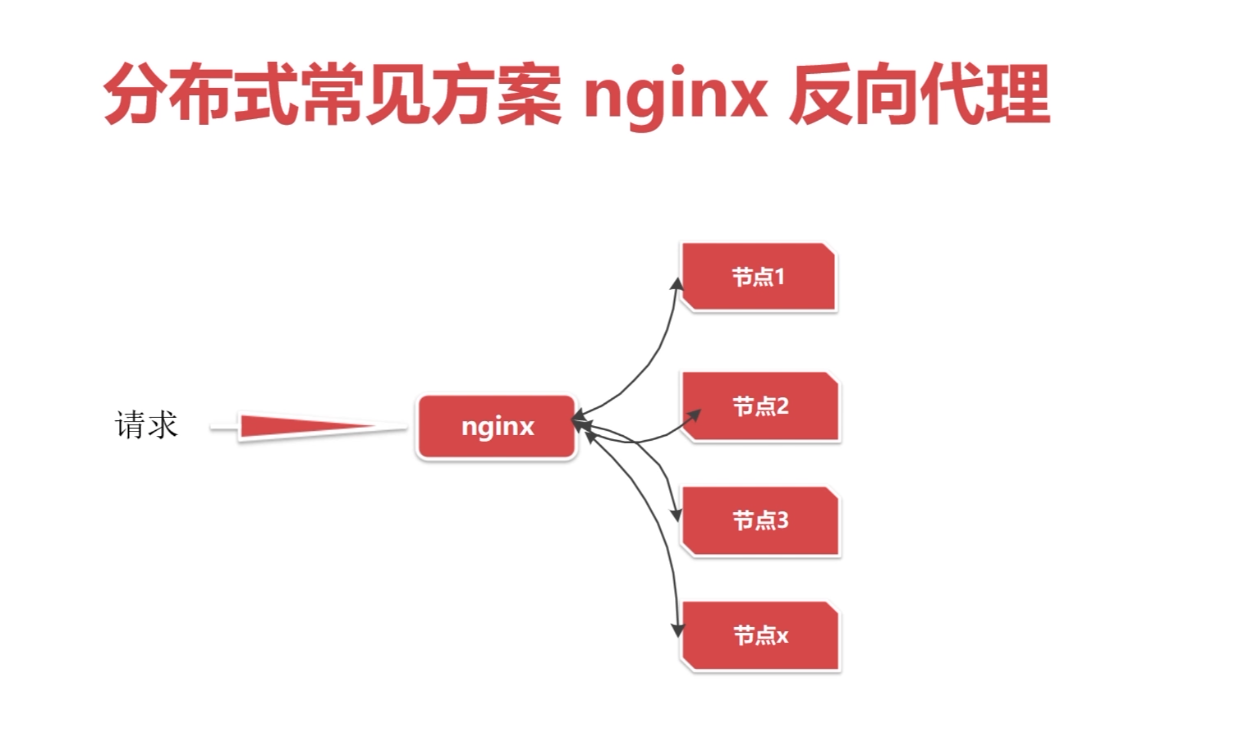
在很多数据同时请求过程中,难免遇到信息的堆积以及请求的泛滥导致后端无法承受请求的压力,从需要一些多线程、多节点的方式来控制。统一多节点时,需要按需分配请求。换句话说,就是负载均衡。
所以具体的设计方案:可以利用 Nginx 来实现:
该方案需要解决的问题:
对于上面的问题,给出下面的方案:
基于 UDP 的分布式应用
开启 ws 接收协程 recvproc/ws 发送协程 sendproc
func recvproc(node *Node) { for{  _,data,err := node.Conn.ReadMessage()  if err!=nil{   log.Println(err.Error())   return  }  //dispatch(data)  //把消息广播到局域网  broadMsg(data)  log.Printf("[ws]<=%s\n",data) }}
func sendproc(node *Node) { for {  select {  case data:= <-node.DataQueue:   err := node.Conn.WriteMessage(websocket.TextMessage,data)   if err!=nil{    log.Println(err.Error())    return   }  } }}
复制代码
也可以通过开启 udp 接收协程 udprecvproc/udp 发送协程 udpsendproc
func udprecvproc(){ log.Println("start udprecvproc")  //todo 监听udp广播端口  con,err:=net.ListenUDP("udp",&net.UDPAddr{   IP:net.IPv4zero,   Port:3000,  })  defer con.Close()  if err!=nil{log.Println(err.Error())} //TODO 处理端口发过来的数据 for{  var buf [512]byte  n,err:=con.Read(buf[0:])  if err!=nil{   log.Println(err.Error())   return  }  //直接数据处理  dispatch(buf[0:n]) } log.Println("stop updrecvproc")}
func udpsendproc(){ log.Println("start udpsendproc") //todo 使用udp协议拨号 con,err:=net.DialUDP("udp",nil,  &net.UDPAddr{   IP:net.IPv4(192,168,0,255),   Port:3000,  }) defer con.Close() if err!=nil{  log.Println(err.Error())  return } //todo 通过的到的con发送消息 //con.Write() for{  select {  case data := <- udpsendchan:   _,err=con.Write(data)   if err!=nil{    log.Println(err.Error())    return   }  } }}
复制代码
通过用来存放发送的要广播的数据
var udpsendchan chan []byte=make(chan []byte,1024)//todo 将消息广播到局域网func broadMsg(data []byte){ udpsendchan<-data}
复制代码
websocket 收到消息->broadMsg 广播到局域网
udp 接收到收到消息->dispatch 发送给 dstid,自己是局域网一份子,所以也能接收到消息
//使用udp协议拨号con,err:=net.DialUDP("udp",nil, &net.UDPAddr{ IP:net.IPv4(192,168,0,255), Port:3000, })defer con.Close()if err!=nil{ log.Println(err.Error()) return}
复制代码
func dispatch(data[]byte){ //解析data为message msg := Message{} err := json.Unmarshal(data,&msg) if err!=nil{ log.Println(err.Error()) return } //根据cmd对逻辑进行处理 switch msg.Cmd { case CMD_SINGLE_MSG: sendMsg(msg.Dstid,data) case CMD_ROOM_MSG: //群聊转发逻辑 for _,v:= range clientMap{ if v.GroupSets.Has(msg.Dstid){ v.DataQueue<-data } } case CMD_HEART: //一般啥都不做 }}
复制代码
分布式部署实战
前面讲过了很多实践,这里需要将应用部署到服务器了,这里分布式部署有很多种方法:
这里采用 K8s 部署服务,利用 nginx 代理前端。先来看看 Nginx:
#user  nobody;worker_processes  1;
#error_log  logs/error.log;#error_log  logs/error.log  notice;#error_log  logs/error.log  info;
#pid        logs/nginx.pid;

events {    worker_connections  1024;}

http {    include       mime.types;    default_type  application/octet-stream;
        sendfile        on;    #tcp_nopush     on;
    #keepalive_timeout  0;    keepalive_timeout  65;
    #gzip  on;	upstream wsbackend {			server 192.168.173.145:8080;			server 192.168.173.145:8080;			hash $request_uri;	}	map $http_upgrade $connection_upgrade {    default upgrade;    ''      close;	}    server {	  listen  80;	  server_name localhost;	  location / {	   proxy_pass http://wsbackend;	  }	  #	  location ^~ /chat {	   proxy_pass http://wsbackend;	   #	   proxy_connect_timeout 500s;       proxy_read_timeout 500s;	   proxy_send_timeout 500s;	   	   proxy_set_header Upgrade $http_upgrade;#websockt        proxy_set_header Connection "Upgrade";	  }	 }
}
复制代码
接下来,先进行后端服务编译:
#!/bin/shrm -rf ./releasemkdir releasego build -o chatchmod +x ./chatcp chat ./release/cp favicon.ico ./release/cp -arf ./asset ./release/cp -arf ./view ./release/
复制代码
basedir=`cd $(dirname $0); pwd -P`echo ${basedir}current=$(pwd)cd ${basedir}/../..sudo docker build -f ${basedir}/dockerfile -t web-chat .cd $current
复制代码
最后,生成 yaml:
apiVersion: apps/v1kind: Deploymentmetadata: labels: app: web-chat name: web-chatspec: replicas: 1 selector: matchLabels: app: web-chat template: metadata: labels: app: web-chat spec: containers: - image: {{ cluster_cfg['cluster']['docker-registry']['prefix'] }}web-chat imagePullPolicy: Always name: web-chat ports: - containerPort: 8090 volumeMounts: - name: web-chat-config mountPath: /web-chat/conf volumes: - name: web-chat-config configMap: name: web-chat-config nodeSelector: web-chat: "true" restartPolicy: Always
复制代码
这样,后端即可部署:
kubectl create -f chat-deploy.yml
复制代码
如果考虑多节点,K8s 提供扩容或缩容 Deployment:
kubectl scale --replicas=3 deployment/web-chat
复制代码


评论