业务背景
在我们的系统中当客户完成支付后,保单管理系统会通过 MQ 推送出一条包含保单信息的消息,该消息被多个系统订阅。
消息推送平台会根据保单信息发送各式各样的通知(短信,微信通知等),会员中心则根据保单信息,完成会员的积分累积和会员等级变更。在早期推送的通知中,并不包含会员的等级信息,现在为了彰显客户的身份,要求在通知中表明客户的等级。
理想的情况是,消息推送平台查询客户信息前,会员中心已经完成了客户等级的变更,但现实中可能因为各种原因,客户中心无法及时处理会员等级变更,导致消息推送平台无法查询到最新的会员等级。为了“避免”这种情况,我们在查询客户信息时引入了重试机制。
我们的业务要求中,通知中的客户的会员等级允许稍有偏差, 但通知一定要及时发出,因此我们的重试策略较为宽松,判断是否由该订单或之后的订单引起的会员信息变更,如果是则跳出重试,否则重试 3 次,每次间隔 1 秒,如果依旧没有获取到预期的结果,则使用当前结果发送通知。
技术选型
最容易想到的方案是通过 while 循环进行重试,对查询结果和重试次数加以限制,决定何时跳出重试,例如:
CustomerInfo customerInfo;int count = 0; while(count < 3) { customerInfo = CustomerCenter.queryCustomerInfo(customerid); if(判断条件) { break; } count ++; if(count < 3) { TimeUnit.SECONDS.sleep(1); }}
复制代码
虽然这么写已经能够满足业务需求,但重试条件,重试次数,休眠时间与重试机制耦合在一起,任意点的变动都相当于修改整个重试机制,这样显得不够优雅,甚至非常粗糙,因此我们想到了市面上两个较为流行的重试框架:Spring Retry 和 Guava Retry。
Spring Retry
Spring Retry 支持通过注解和代码实现重试机制,但问题是 Spring Retry 只支持在抛出异常时进行重试,例如我们通过代码构建一个 ReteyTemplate:
RetryTemplate retryTemplate = RetryTemplate.builder().retryOn(Exception.class).build();
复制代码
重试条件通过RetryTemplateBuilder#retryOn来设置,我们来看该方法的声明:
public class RetryTemplateBuilder { public RetryTemplateBuilder retryOn(Class<? extends Throwable> throwable) { // 省略 } public RetryTemplateBuilder retryOn(List<Class<? extends Throwable>> throwables) { // 省略 }}
复制代码
可以看到RetryTemplateBuilder#retryOn方法的入参仅支持 Throwable 及其子类,因此 Spring Retry 并不能满足我们的业务需求被否决。
Guava Retry
再来看 Guava Retry,它提供了比较灵活的重试条件,允许在抛出异常时,或在结果不符合预期时进行重试。
public class RetryerBuilder<V> { public RetryerBuilder<V> retryIfException() { // 省略 } public RetryerBuilder<V> retryIfRuntimeException() { // 省略 } public RetryerBuilder<V> retryIfExceptionOfType(@Nonnull Class<? extends Throwable> exceptionClass) { // 省略 } public RetryerBuilder<V> retryIfException(@Nonnull Predicate<Throwable> exceptionPredicate) { // 省略 } public RetryerBuilder<V> retryIfResult(@Nonnull Predicate<V> resultPredicate) { // 省略 }}
复制代码
结合实际的业务需求,Guava Retry 能够满足我们的业务需求。
使用 Guava Retry
首先是引入 Guava Retry 的依赖:
<dependency> <groupId>com.github.rholder</groupId> <artifactId>guava-retrying</artifactId> <version>2.0.0</version></dependency>
复制代码
引入依赖后,我们就可以构建并使用重试器 Retryer 了,接下来我们来看构建 Retryer 的两种方式:通过构造器创建和通过建造者创建。
Tips:以下涉及到源码的部分,均会省略参数检查的部分。
Retryer 的构造器
先来看 Retryer 的构造器:
public final class Retryer<V> { public Retryer(@Nonnull StopStrategy stopStrategy, @Nonnull WaitStrategy waitStrategy, @Nonnull Predicate<Attempt<V>> rejectionPredicate) { this(AttemptTimeLimiters.<V>noTimeLimit(), stopStrategy, waitStrategy, BlockStrategies.threadSleepStrategy(), rejectionPredicate); } public Retryer(@Nonnull AttemptTimeLimiter<V> attemptTimeLimiter, @Nonnull StopStrategy stopStrategy, @Nonnull WaitStrategy waitStrategy, @Nonnull Predicate<Attempt<V>> rejectionPredicate) { this(attemptTimeLimiter, stopStrategy, waitStrategy, BlockStrategies.threadSleepStrategy(), rejectionPredicate); } public Retryer(@Nonnull AttemptTimeLimiter<V> attemptTimeLimiter, @Nonnull StopStrategy stopStrategy, @Nonnull WaitStrategy waitStrategy, @Nonnull BlockStrategy blockStrategy, @Nonnull Predicate<Attempt<V>> rejectionPredicate) { this(attemptTimeLimiter, stopStrategy, waitStrategy, blockStrategy, rejectionPredicate, new ArrayList<RetryListener>()); } @Beta public Retryer(@Nonnull AttemptTimeLimiter<V> attemptTimeLimiter, @Nonnull StopStrategy stopStrategy, @Nonnull WaitStrategy waitStrategy, @Nonnull BlockStrategy blockStrategy, @Nonnull Predicate<Attempt<V>> rejectionPredicate, @Nonnull Collection<RetryListener> listeners) { this.attemptTimeLimiter = attemptTimeLimiter; this.stopStrategy = stopStrategy; this.waitStrategy = waitStrategy; this.blockStrategy = blockStrategy; this.rejectionPredicate = rejectionPredicate; this.listeners = listeners; }}
复制代码
Retryer 提供了 4 个构造器,前 3 个构造器都会回归到包含 6 个参数的构造器中,分别解释下这 6 个参数的作用:
以上 6 个参数均为接口,除了 RetryListener 外,Guava Retry 都提供了默认的实现,同时我们也可以根据业务需求自行实现定制化的策略。
Retryer 的建造者
除了使用构造器创建 Retryer 对象外,Guava Retry 还提供了建造者模式 RetryerBuilder:
public class RetryerBuilder<V> { public static <V> RetryerBuilder<V> newBuilder() { return new RetryerBuilder<V>(); } // 省略设置策略的部分 public Retryer<V> build() { AttemptTimeLimiter<V> theAttemptTimeLimiter = attemptTimeLimiter == null ? AttemptTimeLimiters.<V>noTimeLimit() : attemptTimeLimiter; StopStrategy theStopStrategy = stopStrategy == null ? StopStrategies.neverStop() : stopStrategy; WaitStrategy theWaitStrategy = waitStrategy == null ? WaitStrategies.noWait() : waitStrategy; BlockStrategy theBlockStrategy = blockStrategy == null ? BlockStrategies.threadSleepStrategy() : blockStrategy; return new Retryer<V>(theAttemptTimeLimiter, theStopStrategy, theWaitStrategy, theBlockStrategy, rejectionPredicate, listeners); }}
复制代码
RetryerBuilder#build方法最终也是调用了 Retryer 的构造器,我们举个通过建造者创建 Retryer 的例子:
Retryer<Long> retryer = RetryerBuilder.<Long>newBuilder().retryIfException() // 抛出异常时重试.withStopStrategy(StopStrategies.stopAfterAttempt(3)) // 最大重试次数 3 次.withWaitStrategy(WaitStrategies.fixedWait(1, TimeUnit.SECONDS)) // 每次重试间隔 1 秒.build();
复制代码
在这里我使用了不同策略对应的工具类来获取 Guava 中提供的默认策略。
当我们通过构造器或者建造者创建了重试器 Retryer 后,就可以直接使用Retryer#call进行包含重试机制的调用了,如:
Long time = retryer.call(new Callable<Long>() { @Override public Long call() throws Exception { return System.currentTimeMillis(); }});
复制代码
接下来我们就通过源码来分析 Retryer 的重试机制和 Guava Retry 提供的策略。
源码分析
Retryer 重试器
Retryer 是 Guava Retry 的核心类,提供了重试机制,除了构造方法外 Retryer 只提供了两个方法:Retryer#call和Retryer#warp。
其中Retryer#warp提供了对 Retryer 和 Callable 的包装,源码非常简单,不再过多赘述,重点来看Retryer#call方法:
public V call(Callable<V> callable) throws ExecutionException, RetryException { long startTime = System.nanoTime(); // 创建计数器 for (int attemptNumber = 1; ; attemptNumber++) { Attempt<V> attempt; try { // 调用 Callable 接口 V result = attemptTimeLimiter.call(callable); // 封装结果未 ResultAttempt 对象 attempt = new ResultAttempt<V>(result, attemptNumber, TimeUnit.NANOSECONDS.toMillis(System.nanoTime() - startTime)); } catch (Throwable t) { // 封装异常为 ExceptionAttempt 对象 attempt = new ExceptionAttempt<V>(t, attemptNumber, TimeUnit.NANOSECONDS.toMillis(System.nanoTime() - startTime)); } // 调用监听器 for (RetryListener listener : listeners) { listener.onRetry(attempt); } // 判断是否满足重试条件 if (!rejectionPredicate.apply(attempt)) { return attempt.get(); } // 判断是否达到最大重试次数 if (stopStrategy.shouldStop(attempt)) { throw new RetryException(attemptNumber, attempt); } else { // 计算休眠时间 long sleepTime = waitStrategy.computeSleepTime(attempt); try { // 调用阻塞策略 blockStrategy.block(sleepTime); } catch (InterruptedException e) { Thread.currentThread().interrupt(); throw new RetryException(attemptNumber, attempt); } } }}
复制代码
Retryer#call的源码并不复杂,与我们最开始想到的通过 while 循环进行重试的原理是一样的,只不过 Guava Retry 使用了各种策略接口来代替我们耦合到代码中的重试次数,重试条件,休眠时间等,并且对结果和异常进行了封装。
Guava Retry 中使用接口将各种策略与重试机制解耦,当需要修改其中任意策略或替换策略时,只需要修改对应策略的实现,或者新增策略并替换即可,而不需要去改动重试机制的代码,这是它使用起来非常优雅的关键。
接下来,我们按照Retryer#call方法中各种策略调用的顺序,来逐个分析每个策略接口所提供的功能。
Tips:以下涉及到Retryer#call方法的行数,均为该章节展现源码的行数。
AttemptTimeLimiter 接口
首先来看Retryer#call方法中的第 8 行:
V result = attemptTimeLimiter.call(callable);
复制代码
这行代码中使用了 AttemptTimeLimiter 接口,该接口只提供了一个方法:
public interface AttemptTimeLimiter<V> { V call(Callable<V> callable) throws Exception;}
复制代码
该方法用于调用 Callable 接口的实现,Guava Retry 中提供了两个 AttemptTimeLimiter 的实现:NoAttemptTimeLimit 和 FixedAttemptTimeLimit。它们均为工具类 AttemptTimeLimiters 的内部类:
public class AttemptTimeLimiters { @Immutable private static final class NoAttemptTimeLimit<V> implements AttemptTimeLimiter<V> { @Override public V call(Callable<V> callable) throws Exception { return callable.call(); } } @Immutable private static final class FixedAttemptTimeLimit<V> implements AttemptTimeLimiter<V> { private final TimeLimiter timeLimiter; private final long duration; private final TimeUnit timeUnit; // 省略构造方法 @Override public V call(Callable<V> callable) throws Exception { return timeLimiter.callWithTimeout(callable, duration, timeUnit, true); } }}
复制代码
从源码中可以很清晰的看到NoAttemptTimeLimit#call不限制调用的超时时间,而FixedAttemptTimeLimit#call添加了超时时间。其中带有超时的调用时通过 Guava 中的 TimeLimiter 实现的。
因为 NoAttemptTimeLimit 和 FixedAttemptTimeLimit 是工具类 AttemptTimeLimiters 的私有内部类,所以我们无法直接在外部类中使用,但是可以通过工具类 AttemptTimeLimiters 来获取 NoAttemptTimeLimit 和 FixedAttemptTimeLimit,源码如下:
public class AttemptTimeLimiters { public static <V> AttemptTimeLimiter<V> noTimeLimit() { return new NoAttemptTimeLimit<V>(); } public static <V> AttemptTimeLimiter<V> fixedTimeLimit(long duration, @Nonnull TimeUnit timeUnit) { return new FixedAttemptTimeLimit<V>(duration, timeUnit); } public static <V> AttemptTimeLimiter<V> fixedTimeLimit(long duration, @Nonnull TimeUnit timeUnit, @Nonnull ExecutorService executorService) { return new FixedAttemptTimeLimit<V>(duration, timeUnit, executorService); }}
复制代码
Attempt 接口
接着来看Retryer#call方法中第 5 行中声明的 Attempt,该接口声明如下:
public interface Attempt<V> { public V get() throws ExecutionException; public boolean hasResult(); public boolean hasException(); public V getResult() throws IllegalStateException; public Throwable getExceptionCause() throws IllegalStateException; public long getAttemptNumber(); public long getDelaySinceFirstAttempt();}
复制代码
Attempt 接口提供了对重试机制结果(正确调用的结果或发生的异常)的封装,接口中提供了 7 个方法,相信大家通过方法名就可以得知每个方法的作用(下面也会通过实现类解释每个方法的作用)。
我们看 Attempt 接口的两个实现类 ResultAttempt 和 ExceptionAttempt,这两个类是 Retryer 的静态内部类,先来看Retryer#call方法中是如何使用 ResultAttempt 的:
attempt = new ResultAttempt<V>(result, attemptNumber, TimeUnit.NANOSECONDS.toMillis(System.nanoTime() - startTime));
复制代码
创建 ResultAttempt 对象时,传入了 3 个参数,分别是 Callacle 的调用结果,重试次数和自首次调用后的耗时。下面来看 ResultAttempt 的源码:
@Immutablestatic final class ResultAttempt<R> implements Attempt<R> { private final R result; private final long attemptNumber; private final long delaySinceFirstAttempt; // 省略构造方法 // 获取调用结果 @Override public R get() throws ExecutionException { return result; } // 是否包含结果,ResultAttempt 的实现中只返回 true @Override public boolean hasResult() { return true; } // 是否包含异常,ResultAttempt 的实现中只返回 false @Override public boolean hasException() { return false; } // 获取调用结果 @Override public R getResult() throws IllegalStateException { return result; } // 获取异常原因,因为 ResultAttempt 是成功调用,因此无异常 @Override public Throwable getExceptionCause() throws IllegalStateException { throw new IllegalStateException("The attempt resulted in a result, not in an exception"); } // 获取重试次数 @Override public long getAttemptNumber() { return attemptNumber; } // 获取自首次调用后的耗时 @Override public long getDelaySinceFirstAttempt() { return delaySinceFirstAttempt; }}
复制代码
实现上非常的简单,这里我们就不过多赘述了。再来看Retryer#call方法中是如何使用 ExceptionAttempt 的:
try { // 此处是使用 ResultAttempt的逻辑} catch (Throwable t) { attempt = new ExceptionAttempt<V>(t, attemptNumber, TimeUnit.NANOSECONDS.toMillis(System.nanoTime() - startTime));}
复制代码
同样是 3 个参数,只是将 ResultAttempt 中的结果替换为了异常信息。
至于 ExceptionAttempt 的源码实现,因为同样是实现 Attempt 接口,因此我们很容易就能想到 ExceptionAttempt 只是与 ResultAttempt“反过来了”。
RetryListener 接口
Retryer#call方法中第 17~19 行中调用了 RetryListener:
for (RetryListener listener : listeners) { listener.onRetry(attempt);}
复制代码
RetryListener 接口只提供了一个方法:
@Betapublic interface RetryListener { <V> void onRetry(Attempt<V> attempt);}
复制代码
RetryListener 是作为重试过程中的监听器出现的,为扩展处理提供了回调机制。Guava Retry 并没有提供默认实现,另外,RetryListener 被标记为 Beta,在 Guava 的解释中,使用注解 Beta 标识的,未来可能会做出较大改动或者被移除。
Predicate 接口
Retryer#call方法中的第 22 ~ 24 行调用了 Predicate:
if (!rejectionPredicate.apply(attempt)) { return attempt.get();}
复制代码
Predicate 是 Guava 中的谓词接口,我们来看 Predicate 接口中提供的方法:
public interface Predicate<T extends @Nullable Object> extends java.util.function.Predicate<T> { // Guava Retry 中定义的方法 boolean apply(@ParametricNullness T input); // 继承自 Java 中的 Object 类 @Override boolean equals(@CheckForNull Object object);}
复制代码
除了以上两个方法外,Guava 的 Predicate 接口还继承了 Java 的 Predicate 接口,不过这些并不是我们今天的重点。
Predicate 接口在 Guava Retry 中有 3 个实现类,ResultPredicate,ExceptionClassPredicate 和 ExceptionPredicate,它们均是作为 RetryerBuilder 的内部类出现的:
private static final class ResultPredicate<V> implements Predicate<Attempt<V>> { private Predicate<V> delegate; public ResultPredicate(Predicate<V> delegate) { this.delegate = delegate; } @Override public boolean apply(Attempt<V> attempt) { // 判断 Attempt 中是否包含结果 if (!attempt.hasResult()) { return false; } // 获取结果并调用条件谓词的 apply 方法 V result = attempt.getResult(); return delegate.apply(result); }} private static final class ExceptionClassPredicate<V> implements Predicate<Attempt<V>> { private Class<? extends Throwable> exceptionClass; public ExceptionClassPredicate(Class<? extends Throwable> exceptionClass) { this.exceptionClass = exceptionClass; } @Override public boolean apply(Attempt<V> attempt) { if (!attempt.hasException()) { return false; } return exceptionClass.isAssignableFrom(attempt.getExceptionCause().getClass()); }} private static final class ExceptionPredicate<V> implements Predicate<Attempt<V>> { private Predicate<Throwable> delegate; public ExceptionPredicate(Predicate<Throwable> delegate) { this.delegate = delegate; } @Override public boolean apply(Attempt<V> attempt) { if (!attempt.hasException()) { return false; } return delegate.apply(attempt.getExceptionCause()); }}
复制代码
我们通过一段代码来重点解释下 ResultPredicate 的工作原理。首先通过建造者模式创建 Retryer 对象:
Retryer<Integer> retryer = RetryerBuilder.<Integer>newBuilder().retryIfResult(new Predicate<Integer>() { @Override public boolean apply(Integer result) { return result > 0; }}).withStopStrategy(StopStrategies.stopAfterAttempt(3)).build();
复制代码
接着来看RetryerBuilder#retryIfResult方法的源码:
public class RetryerBuilder<V> { public RetryerBuilder<V> retryIfResult(@Nonnull Predicate<V> resultPredicate) { rejectionPredicate = Predicates.or(rejectionPredicate, new ResultPredicate<V>(resultPredicate)); return this; }}
复制代码
可以看到RetryerBuilder#retryIfResult中使用Predicates#or去构建条件谓词,第一个参数是 RetryerBuilder 的成员变量 rejectionPredicate,通过前面的 RetryerBuilder 的源码,我们可以知道 RetryerBuilder 的 rejectionPredicate 最终会成为 Retryer 的成员变量,第二个参数是通过我们传入的 Predicate 对象构建的 ResultPredicate 对象。
Predicates#or方法的作用是将传入的参数合并为新的 Predicate 对象:
public static <T extends @Nullable Object> Predicate<T> or(Predicate<? super T> first, Predicate<? super T> second) { return new OrPredicate<>(Predicates.<T>asList(checkNotNull(first), checkNotNull(second)));}
复制代码
注意合并后的 Predicate 对象是其实现类 OrPredicate,该类中的成员变量private final List<? extends Predicate<? super T>> components,包含了所有的通过 RetryerBuilder 添加的条件谓词。
OrPredicate#apply方法是通过循环调用不同的 Predicate 对象的:
private static class OrPredicate<T extends @Nullable Object> implements Predicate<T>, Serializable { private final List<? extends Predicate<? super T>> components; @Override public boolean apply(@ParametricNullness T t) { for (int i = 0; i < components.size(); i++) { if (components.get(i).apply(t)) { return true; } } return false; }}
复制代码
OrPredicate#apply方法会循环遍历条件谓词并调用Predicate#apply方法,这就回到了ResultPredicate#apply方法中了。
我们注意到在RetryerBuilder#retryIfResult构建 ResultPredicate 对象时,我们传入的内部类 Predicate 对象会作为 ResultPredicate 的成员变量 delegate,而最终判断结果是否满足条件的也正是通过成员变量 delegate 实现的:
private static final class ResultPredicate<V> implements Predicate<Attempt<V>> { @Override public boolean apply(Attempt<V> attempt) { if (!attempt.hasResult()) { return false; } V result = attempt.getResult(); return delegate.apply(result); }}
复制代码
至此,我们已经知晓了 ResultPredicate 在Retryer#call方法中的工作原理,至于 ExceptionClassPredicate 和 ExceptionPredicate,由于原理和 ResultPredicate 相似,我就不做解释了。
StopStrategy 接口
Retryer#call方法中第 27 行中调用了 StopStrategy:
if (stopStrategy.shouldStop(attempt)) { throw new RetryException(attemptNumber, attempt);} else { // 省略休眠策略 }
复制代码
StopStrategy 接口只提供了一个方法,用于判断是否需要重试,接口声明如下:
public interface StopStrategy { boolean shouldStop(Attempt failedAttempt);}
复制代码
Guava Retry 中提供了 3 个实现类:NeverStopStrategy,StopAfterAttemptStrategy 和 StopAfterDelayStrategy。这 3 个实现类均为工具类 StopStrategys 的内部类:
public final class StopStrategies { @Immutable private static final class NeverStopStrategy implements StopStrategy { @Override public boolean shouldStop(Attempt failedAttempt) { return false; } } @Immutable private static final class StopAfterAttemptStrategy implements StopStrategy { private final int maxAttemptNumber; // 省略构造方法 @Override public boolean shouldStop(Attempt failedAttempt) { return failedAttempt.getAttemptNumber() >= maxAttemptNumber; } } @Immutable private static final class StopAfterDelayStrategy implements StopStrategy { private final long maxDelay; // 省略构造方法 @Override public boolean shouldStop(Attempt failedAttempt) { return failedAttempt.getDelaySinceFirstAttempt() >= maxDelay; } }}
复制代码
来解释下这 3 个策略的功能:
通常我们会选择 StopAfterAttemptStrategy,在有时间要求的场景下也可以选择 StopAfterDelayStrategy。
需要注意的是,在Retryer#call的方法中,如果是因为触发 StopStrategy 而导致的停止重试,则会抛出异常 RetryException,该异常中封装了异常信息和最后一次请求的结果。这就要求在使用 Retryer 时,需要做好异常处理。
WaitStrategy 接口和 BlockStrategy 接口
这两个接口分别在Retryer#call方法的第 31 行和 34 行调用:
if (stopStrategy.shouldStop(attempt)) { throw new RetryException(attemptNumber, attempt);} else { // 调用计算休眠时间策略 long sleepTime = waitStrategy.computeSleepTime(attempt); try { // 调用阻塞策略 blockStrategy.block(sleepTime); } catch (InterruptedException e) { Thread.currentThread().interrupt(); throw new RetryException(attemptNumber, attempt); }}
复制代码
WaitStrategy 接口提供了计算休眠时间的策略,而 BlockStrategy 接口提供了重试阻塞策略,接口声明如下:
public interface WaitStrategy { long computeSleepTime(Attempt failedAttempt);} public interface BlockStrategy { void block(long sleepTime) throws InterruptedException;}
复制代码
两者的功能是相辅相成的,WaitStrategy#computeSleepTime计算每次要休眠的时间,而BlockStrategy#block负责执行阻塞策略。
我们先来看 Guava Retry 中提供的 BlockStrategy 的实现 ThreadSleepStrategy,该实现作为工具类 BlockStrategys 的内部类出现,实现非常简单:
public final class BlockStrategies { @Immutable private static class ThreadSleepStrategy implements BlockStrategy { @Override public void block(long sleepTime) throws InterruptedException { // 休眠指定时间 Thread.sleep(sleepTime); } }}
复制代码
接着来看 WaitStrategy 的实现类,Guava Retry 中提供了 7 种 WaitStrategy 接口的实现:
以上 7 种策略均为工具类 WaitStrategys 的内部类,可以直接通过 WaitStrategys 来使用:
public final class WaitStrategies { // 使用固定休眠时间策略 public static WaitStrategy fixedWait(long sleepTime, @Nonnull TimeUnit timeUnit) throws IllegalStateException { return new FixedWaitStrategy(timeUnit.toMillis(sleepTime)); } // 使用随机休眠时间策略 public static WaitStrategy randomWait(long maximumTime, @Nonnull TimeUnit timeUnit) { return new RandomWaitStrategy(0L, timeUnit.toMillis(maximumTime)); } public static WaitStrategy randomWait(long maximumTime, @Nonnull TimeUnit timeUnit) { return new RandomWaitStrategy(0L, timeUnit.toMillis(maximumTime)); } // 使用按步长增长的休眠时间策略 public static WaitStrategy incrementingWait(long initialSleepTime, @Nonnull TimeUnit initialSleepTimeUnit, long increment, @Nonnull TimeUnit incrementTimeUnit) { return new IncrementingWaitStrategy(initialSleepTimeUnit.toMillis(initialSleepTime), incrementTimeUnit.toMillis(increment)); } // 使用指数增长的休眠时间策略 public static WaitStrategy exponentialWait() { return new ExponentialWaitStrategy(1, Long.MAX_VALUE); } public static WaitStrategy exponentialWait(long maximumTime, @Nonnull TimeUnit maximumTimeUnit) { return new ExponentialWaitStrategy(1, maximumTimeUnit.toMillis(maximumTime)); } public static WaitStrategy exponentialWait(long multiplier, long maximumTime, @Nonnull TimeUnit maximumTimeUnit) { return new ExponentialWaitStrategy(multiplier, maximumTimeUnit.toMillis(maximumTime)); } // 使用通过斐波那契数列计算休眠时间的策略 public static WaitStrategy fibonacciWait() { return new FibonacciWaitStrategy(1, Long.MAX_VALUE); } public static WaitStrategy fibonacciWait(long maximumTime, @Nonnull TimeUnit maximumTimeUnit) { return new FibonacciWaitStrategy(1, maximumTimeUnit.toMillis(maximumTime)); } public static WaitStrategy fibonacciWait(long multiplier, long maximumTime, @Nonnull TimeUnit maximumTimeUnit) { return new FibonacciWaitStrategy(multiplier, maximumTimeUnit.toMillis(maximumTime)); } // 使用混合的休眠时间策略 public static WaitStrategy join(WaitStrategy... waitStrategies) { List<WaitStrategy> waitStrategyList = Lists.newArrayList(waitStrategies); return new CompositeWaitStrategy(waitStrategyList); } // 使用发生异常时的休眠时间 public static <T extends Throwable> WaitStrategy exceptionWait(@Nonnull Class<T> exceptionClass, @Nonnull Function<T, Long> function) { return new ExceptionWaitStrategy<T>(exceptionClass, function); }}
复制代码
最后我们来逐个分析每种策略的实现方式。
FixedWaitStrategy
最常用的策略,每次重试后休眠固定的时间,源码如下:
@Immutableprivate static final class FixedWaitStrategy implements WaitStrategy { private final long sleepTime; public FixedWaitStrategy(long sleepTime) { this.sleepTime = sleepTime; } @Override public long computeSleepTime(Attempt failedAttempt) { return sleepTime; }}
复制代码
RandomWaitStrategy
每次在最小休眠时间和最大休眠时间之间随机出一个休眠时间,源码如下:
@Immutableprivate static final class RandomWaitStrategy implements WaitStrategy { private static final Random RANDOM = new Random(); private final long minimum; private final long maximum; public RandomWaitStrategy(long minimum, long maximum) { this.minimum = minimum; this.maximum = maximum; } @Override public long computeSleepTime(Attempt failedAttempt) { long t = Math.abs(RANDOM.nextLong()) % (maximum - minimum); return t + minimum; }}
复制代码
计算方法并不复杂,计算出最小时间到最大时间中的一个随机数,再加上最小时间即可。
IncrementingWaitStrategy
随着每次重试,休眠时间都会固定增长的策略:
@Immutableprivate static final class IncrementingWaitStrategy implements WaitStrategy { private final long initialSleepTime; private final long increment; public IncrementingWaitStrategy(long initialSleepTime, long increment) { this.initialSleepTime = initialSleepTime; this.increment = increment; } @Override public long computeSleepTime(Attempt failedAttempt) { long result = initialSleepTime + (increment * (failedAttempt.getAttemptNumber() - 1)); return result >= 0L ? result : 0L; }}
复制代码
参数为初始的休眠时间和每次增长的步长,通过 Retryer 中的重试次数计算每次增长的时间。
ExponentialWaitStrategy
按照重试次数指数增长休眠时间的策略:
@Immutableprivate static final class ExponentialWaitStrategy implements WaitStrategy { private final long multiplier; private final long maximumWait; public ExponentialWaitStrategy(long multiplier, long maximumWait) { this.multiplier = multiplier; this.maximumWait = maximumWait; } @Override public long computeSleepTime(Attempt failedAttempt) { double exp = Math.pow(2, failedAttempt.getAttemptNumber()); long result = Math.round(multiplier * exp); if (result > maximumWait) { result = maximumWait; } return result >= 0L ? result : 0L; }}
复制代码
传入参数为最大休眠时间和系数,以 2 位底,以重试次数为指数计算出休眠时间的基数,并乘以传入的系数,得出真正的休眠时间,当计算结果超过最大休眠时间时,使用最大休眠时间。
FibonacciWaitStrategy
按照重试次数获取对应斐波那契数作为休眠时间的策略:
@Immutableprivate static final class FibonacciWaitStrategy implements WaitStrategy { private final long multiplier; private final long maximumWait; public FibonacciWaitStrategy(long multiplier, long maximumWait) { this.multiplier = multiplier; this.maximumWait = maximumWait; } @Override public long computeSleepTime(Attempt failedAttempt) { long fib = fib(failedAttempt.getAttemptNumber()); long result = multiplier * fib; if (result > maximumWait || result < 0L) { result = maximumWait; } return result >= 0L ? result : 0L; } private long fib(long n) { if (n == 0L) return 0L; if (n == 1L) return 1L; long prevPrev = 0L; long prev = 1L; long result = 0L; for (long i = 2L; i <= n; i++) { result = prev + prevPrev; prevPrev = prev; prev = result; } return result; }}
复制代码
与 ExponentialWaitStrategy 的策略非常相似,传入参数为最大休眠时间和系数,获取重试次数对应的斐波那契数为休眠时间的基数,并乘以传入的系数,得出真正的休眠时间,当计算结果超过最大休眠时间时,使用最大休眠时间。
CompositeWaitStrategy
融合多种计算休眠时间策略的策略:
@Immutableprivate static final class CompositeWaitStrategy implements WaitStrategy { private final List<WaitStrategy> waitStrategies; public CompositeWaitStrategy(List<WaitStrategy> waitStrategies) { this.waitStrategies = waitStrategies; } @Override public long computeSleepTime(Attempt failedAttempt) { long waitTime = 0L; for (WaitStrategy waitStrategy : waitStrategies) { waitTime += waitStrategy.computeSleepTime(failedAttempt); } return waitTime; }}
复制代码
计算出每种休眠时间策略的休眠时间,并相加得到最终的休眠时间。
ExceptionWaitStrategy
这种策略用于发生异常时计算休眠时间:
@Immutableprivate static final class ExceptionWaitStrategy<T extends Throwable> implements WaitStrategy { private final Class<T> exceptionClass; private final Function<T, Long> function; public ExceptionWaitStrategy(@Nonnull Class<T> exceptionClass, @Nonnull Function<T, Long> function) { this.exceptionClass = exceptionClass; this.function = function; } @SuppressWarnings({"ThrowableResultOfMethodCallIgnored", "ConstantConditions", "unchecked"}) @Override public long computeSleepTime(Attempt lastAttempt) { if (lastAttempt.hasException()) { Throwable cause = lastAttempt.getExceptionCause(); if (exceptionClass.isAssignableFrom(cause.getClass())) { return function.apply((T) cause); } } return 0L; }}
复制代码
需要传入异常类型和 Function 的实现,当发生相应类型的异常时,执行Function#apply方法计算休眠时间,可以实现不同异常的休眠时间不相同。
举个例子,首先定义 3 个异常以及它们的父类:
public class BaseException extends Exception { public BaseException(String message) { super(message); }} public class OneException extends BaseException { public OneException(String message) { super(message); }} public class TwoException extends BaseException { public TwoException(String message) { super(message); }} public class ThreeException extends BaseException { public ThreeException(String message) { super(message); }}
复制代码
接着实现 Function 接口:
public class ExceptionFunction implements Function<BaseException, Long> { @Override public Long apply(BaseException input) { if (OneException.class.isAssignableFrom(input.getClass())) { System.out.println("触发OneException,休眠1秒!"); return 1000L; } if (TwoException.class.isAssignableFrom(input.getClass())) { System.out.println("触发TwoException,休眠2秒!"); return 2000L; } if (ThreeException.class.isAssignableFrom(input.getClass())) { System.out.println("触发ThreeException,休眠3秒!"); return 3000L; } return 0L; }}
复制代码
该接口中根据不同的异常,返回不同的休眠时间。
最后我们来构建重试器,并调用Retryer#call方法:
Retryer<Integer> retryer = RetryerBuilder.<Integer>newBuilder().retryIfException().withWaitStrategy(WaitStrategies.exceptionWait(BaseException.class, new ExceptionFunction())).withStopStrategy(StopStrategies.stopAfterAttempt(4)).build(); int number = retryer.call(new Callable<>() { private int count = 1; @Override public Integer call() throws Exception { if (count < 2) { count++; throw new OneException("One"); } if (count < 3) { count++; throw new TwoException("Two"); } if (count < 4) { count++; throw new ThreeException("Three"); } return count; }});System.out.println(number);
复制代码
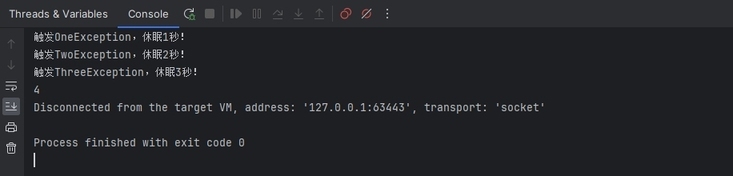
重试器 Retryer 在调用接口异常时进行重试,最大重试次数为 4 次,休眠时间的策略上,选择发生异常时,根据不同的异常休眠不同的时间。Retryer.call调用的 Callable 接口中,前 3 次调用分别抛出 OneException,TwoException 和 ThreeException,在第 4 次调用时返回数字 4。执行代码后可以观察到如下输出内容:
证明在发生不同异常时,触发了不同的休眠时间策略。
实战演练
目前为止,我们已经从使用和原理上了解了 Guava Retry,接下来我们就以开篇所说的场景为例,进行实战演练。
我们的业务场景中,可以接受通知中会员等级的变化不够及时,但因为金融监管的要求,不能接受因为客户等级的变化,导致延后发送通知。因此我们在重试策略的制定中非常宽松:重试 3 次每次间隔 1 秒,如果 3 次后依旧没有获取到最新的数据,就使用前一次请求的结果。
首先创建客户类:
public class CustomerDTO { private Long customerId; private String customerName; private CustomerLevel customerLevel; private Long lastOrderId;}
复制代码
其中 lastOrderId 记录了最后一次引起客户等级,客户积分发生变化的订单 Id,我们需要以此来判断是否获取到对应的客户信息。
接着创建获取客户信息的方法,用来模仿客户中心:
public class CustomerCenter { private static int count = 0; public static CustomerDTO getCustomerInfo(Long customerId) { if (count < 1) { count++; return createCustomerInfo(customerId, CustomerLevel.JUNIOR_MEMBER, 1234567L); } else if (count < 2) { count++; return createCustomerInfo(customerId, CustomerLevel.INTERMEDIATE_MEMBER, 12345678L); } else { count = 0; return createCustomerInfo(customerId, CustomerLevel.SENIOR_MEMBER, 123456789L); } } private static CustomerDTO createCustomerInfo(Long customerId, CustomerLevel customerLevel, Long lastOrdertId) { CustomerDTO customerDTO = new CustomerDTO(); customerDTO.setCustomerId(customerId); customerDTO.setCustomerName("WYZ"); customerDTO.setCustomerLevel(customerLevel); customerDTO.setLastOrderId(lastOrdertId); return customerDTO; }}
复制代码
其中CustomerCenter#getCustomerInfo模拟了在第 3 次查询时获取到最新的客户信息。
最后我们来写重试的代码:
public static void main(String[] args) throws ExecutionException { Long lastOrderId = 123456789L; Retryer<CustomerDTO> retryer = RetryerBuilder.<CustomerDTO>newBuilder() .retryIfResult(customerDTO -> !lastOrderId.equals(customerDTO.getLastOrderId())) .withWaitStrategy(failedAttempt -> 1000) .withStopStrategy(attempt -> attempt.getAttemptNumber() > 2) .build(); CustomerDTO customerDTO; try { customerDTO = retryer.call(() -> CustomerCenter.getCustomerInfo(1L)); } catch (RetryException e) { Attempt<?> attempt = e.getLastFailedAttempt(); customerDTO = (CustomerDTO) attempt.get(); }}
复制代码
创建 Retryer 的过程我就不过多解释了,我们来看第 15,16 行中的部分,通过前面源码的部分我们可以看到,Guava Retry 在超出重试次数后,依旧无法获取到预期结果时,会抛出 RetryException 异常,该异常中除了包含异常信息外,还包含最后一次执行后的 Attempt,因此,我可以通过 Attempt 来获取到最后一次的执行结果,刚刚好满足了我们的业务需求。
好了,今天的内容就到这里了。
文章转载自:王有志
原文链接:https://www.cnblogs.com/wyz1994/p/17878413.html


评论