当我们在一个 Web 应用中使用 WebAssembly,最终的目的要么是执行 wasm 模块的入口程序(通过 start 指令指定的函数),要么是调用其导出的函数,这一切的前提需要创建一个通过 WebAssembly.Instance 对象表示的 wasm 模块实例(源代码)。
一、wasm 模块实例化总体流程
虽然编程模式多种多样,但是 wasm 模块的实例化总体采用如下的流程:
二、利用 WebAssembly.Module 创建实例
我们照例通过一个简单的实例来演示针对 wasm 模块加载和模块实例创建的各种编程模式。我们首先利用 WebAssembly Text Format(WAT)形式定义如下一个 wasm 程序,定义的文件名为 app.wat。如代码所示,我们定义了一个用于输出指定浮点数(i64)绝对值的导出函数 absolute。绝对值通过 f64.abs 指令计算,具体得输出则通过导入的 print 函数完成。
(module (func $print (import "imports" "print") (param $op f64) (param $result f64)) (func (export "absolute") (param $op f64) (local.get $op) (f64.abs (local.get $op)) (call $print) ))
复制代码
我们通过指定 wat2wasm (源代码压缩包种提供了对应的.exe)命令(wat2wasm app.wat –o app.wasm)编译 app.wat 并生成 app.wasm 后,定义如下这个 index.html 页面,作为宿主程序的 JavaScript 脚本完全按照上面所示的步骤完成了针对 wasm 模块实例的创建。
<html> <head></head> <body> <div id="container"></div> <script> var print = (op, result) => document.getElementById("container").innerText = `abs(${op}) = ${result}`; fetch("app.wasm") .then((response) => response.arrayBuffer()) .then(bytes => { var module = new WebAssembly.Module(bytes); var instance = new WebAssembly.Instance(module, {"imports":{"print": print}}); instance.exports.absolute(-3.14); }) </script> </body></html>
复制代码
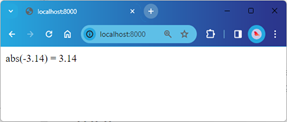
具体来说,我们调用 fetch 函数将 app.wasm 文件下载下来后,我们将获得的字节内容作为参数调用构建函数创建了一个 WebAssembly.Module 对象。然后将这个 Module 对象和创建的导入对象({"imports":{"print": print}})作为参数调用构造函数创建了一个 WebAssembly.Instance 对象,该对象正是我们需要的 wasm 模块实例。我们从模块实例中提取并执行导出的 absolute 函数。导入的 print 函数会将绝对值计算表达式以如下的形式输出到页面中。
image
除了调用构造函数以同步(阻塞)的方式根据 WebAssembly.Module 对象创建 WebAssembly.Instance 对象外,我们还可以调用 WebAssembly.instantiate 静态方法以异步的方式“激活”wasm 模块实例,它返回一个 Promise<WebAssembly.Instance>对象。
var print = (op, result) => document.getElementById("container").innerText = `abs(${op}) = ${result}`;fetch("app.wasm") .then((response) => response.arrayBuffer()) .then(bytes => { var module = new WebAssembly.Module(bytes); return WebAssembly.instantiate(module, { "imports": { "print": print } }); }) .then(instance => instance.exports.absolute(-3.14));
复制代码
三、通过字节内容创建创建实例
静态方法 WebAssembly.instantiate 还提供了另一个重载,我们可以直接指定下载 wasm 模块文件得到的字节内容作为参数。这个重载返回一个 Promise<WebAssembly.WebAssemblyInstantiatedSource>对象,WebAssemblyInstantiatedSource 对象的 instance 属性返回的正是我们需要的 wasm 模块实例。
var print = (op, result) => document.getElementById("container").innerText = `abs(${op}) = ${result}`;fetch("app.wasm") .then((response) => response.arrayBuffer()) .then(bytes => WebAssembly.instantiate(bytes, {"imports":{"print": print}})) .then(result =>result.instance.exports.absolute(-3.14));
复制代码
四、利用 XMLHttpRequest 加载 wasm 模块
fetch 函数是我们推荐的用于下载 wasm 模块文件的方式,不过我们一定义要使用传统的 XMLHttpRequest 对象也未尝不可。上面的三种激活 wasm 模块实例的方式可以采用如下的形式来实现。
var print = (op, result) => document.getElementById("container").innerText = `abs(${op}) = ${result}`;const request = new XMLHttpRequest();request.open("GET", "app.wasm");request.responseType = "arraybuffer";request.send();
request.onload = () => {    var bytes = request.response;    var module = new WebAssembly.Module(bytes);    var instance = new WebAssembly.Instance(module, {"imports":{"print": print}});    instance.exports.absolute(-3.14);};
复制代码
上面演示的利用创建的 WebAssembly.Module 对象和导入对象调用构造函数创建 WebAssembly.Instance 的同步形式。下面则是将二者作为参数调用静态方式 WebAssembly.instantiate 以异步方式激活 wasm 模块实例的方式。
var print = (op, result) => document.getElementById("container").innerText = `abs(${op}) = ${result}`;const request = new XMLHttpRequest();request.open("GET", "app.wasm");request.responseType = "arraybuffer";request.send();
request.onload = () => {    var bytes = request.response;    WebAssembly        .instantiate(request.response, {"imports":{"print": print}})        .then(result => result.instance.exports.absolute(-3.14));};
复制代码
下面演示 WebAssembly.instantiate 静态方法的另一个重载。
var print = (op, result) => document.getElementById("container").innerText = `abs(${op}) = ${result}`;const request = new XMLHttpRequest();request.open("GET", "app.wasm");request.responseType = "arraybuffer";request.send();
request.onload = () => {    var bytes = request.response;    WebAssembly        .instantiate(request.response, {"imports":{"print": print}})        .then(result => result.instance.exports.absolute(-3.14));};
复制代码
五、极简编程方式
其实我们有“一步到位”的方式,那就是按照如下的形式执行静态方法 WebAssembly.instantiateStreaming。该方法的第一个参数用于提供下载.wasm 模块文件的 PromiseLike<Response>对象,第二个参数则用于指定导入对象。该方法同样返回一个 Promise<WebAssembly.WebAssemblyInstantiatedSource>对象,WebAssemblyInstantiatedSource 的 instance 属性返回的正是我们所需的 wasm 模块实例。
var print = (op, result) => document.getElementById("container").innerText = `abs(${op}) = ${result}`;WebAssembly .instantiateStreaming(fetch("app.wasm"), {"imports":{"print": print}}) .then(result => result.instance.exports.absolute(-3.14))
复制代码
文章转载自:Artech
原文链接:https://www.cnblogs.com/artech/p/17994560/wasm_loading
体验地址:http://www.jnpfsoft.com/?from=001


评论