写点什么

Eclipse Theia 技术揭秘——自定义布局

作者:龙之幽谷
  • 2022 年 9 月 28 日
    北京
  • 本文字数:5516 字

    阅读完需:约 18 分钟

Eclipse Theia技术揭秘——自定义布局

在上篇文章 脚手架源码分析 文章中,我们分析了启动过程中前端页面是如何展示的,那么本篇文章我们介绍一下 theia 布局的相关内容以及如何自定义布局。

PhosphorJS

Theia 的组件和布局系统是使用 PhosphorJS 实现的,PhosphorJS 提供了一组丰富的组件、布局、事件和数据结构。这些使开发人员能够构建高质量的、类桌面的 Web 应用程序。Theia 为什么要用 PhosphorJS 作为布局系统呢?在 IDE 应用程序中的选项卡式和停靠式面板,这些类型的交互必须使用 JavaScript 实现,并且以可扩展且优雅的方式实现动态添加数量的模式,这就包括消息传递、调整大小/附加/分离/显示/隐藏事件、大小约束聚合和高效布局计算。PhosphorJS 以一种灵活、独立且与现有代码兼容的方式提供了这些目前在 web 上缺少的能力。


Github 地址:https://github.com/phosphorjs/phosphor,文档地址:http://phosphorjs.github.io/。不过 PhosphorJS 作者退休,项目已归档,该项目现在被 Jupyter 团队重命名为 jupyterlab/lumino,Github 地址为:https://github.com/jupyterlab/lumino


如何实现的?


  • PhosphorJS 提供了一个简单而灵活的小部件类,它为消息传递和 DOM 节点操作建立了层次结构。这允许在整个层次结构中传播各种消息,例如:调整大小、附加、分离、显示和隐藏(以及其他功能)

  • 一旦建立了可靠传播的调整大小消息,就有可能在 JavaScript 中实现布局,这是单独使用 CSS 无法实现的。通过以绝对值明确指定节点的位置和大小,浏览器能够优化回流,使其包含在页面的受影响部分中。这意味着对应用程序一部分的更改不会导致整个页面的回流成本。

  • PhosphorJS 认识到 CSS 在很多方面都很好,并且不会阻止开发人员在适当的时候使用它。PhosphorJS 布局与标准 CSS 布局配合得很好,两者可以在小部件层次结构中自由混合。

  • PhosphorJS 认识到开发人员最喜欢的框架非常适合特定任务。Phosphor Widget 实例可以托管由任何其他框架生成的 DOM 内容,并且这样的可以自由嵌 Widget 入任何 Phosphor Widget 层次结构中。

  • PhosphorJS 提供了大量预定义的小部件和布局,这些部件和布局很难正确有效地实现,例如:菜单和菜单栏、拆分面板、选项卡和停靠面板。这使得创建前面描述的富桌面风格应用程序变得简单。


@phosphor/widgets 提供了很多布局和组件:


  • BoxLayout

  • BoxPanel

  • DockLayout

  • DockPanel

  • Menu

  • MenuBar

  • Panel

  • PanelLayout

  • TabBar


其中像 BoxLayout、DockLayout 都是继承 layout,像 BoxPanel、MenuBar、TabBar 等都是继承 Widget。Widget 有诸多的生命周期回调函数:


  • onActivateRequest

  • onBeforeShow

  • onAfterShow

  • onBeforeHide

  • onAfterHide

  • onBeforeAttach

  • onAfterAttach

  • onBeforeDetach

  • onAfterDetach

  • onChildAdded

  • onChildRemoved

  • onCloseRequest

  • onResize

  • onUpdateRequest

  • onFitRequest


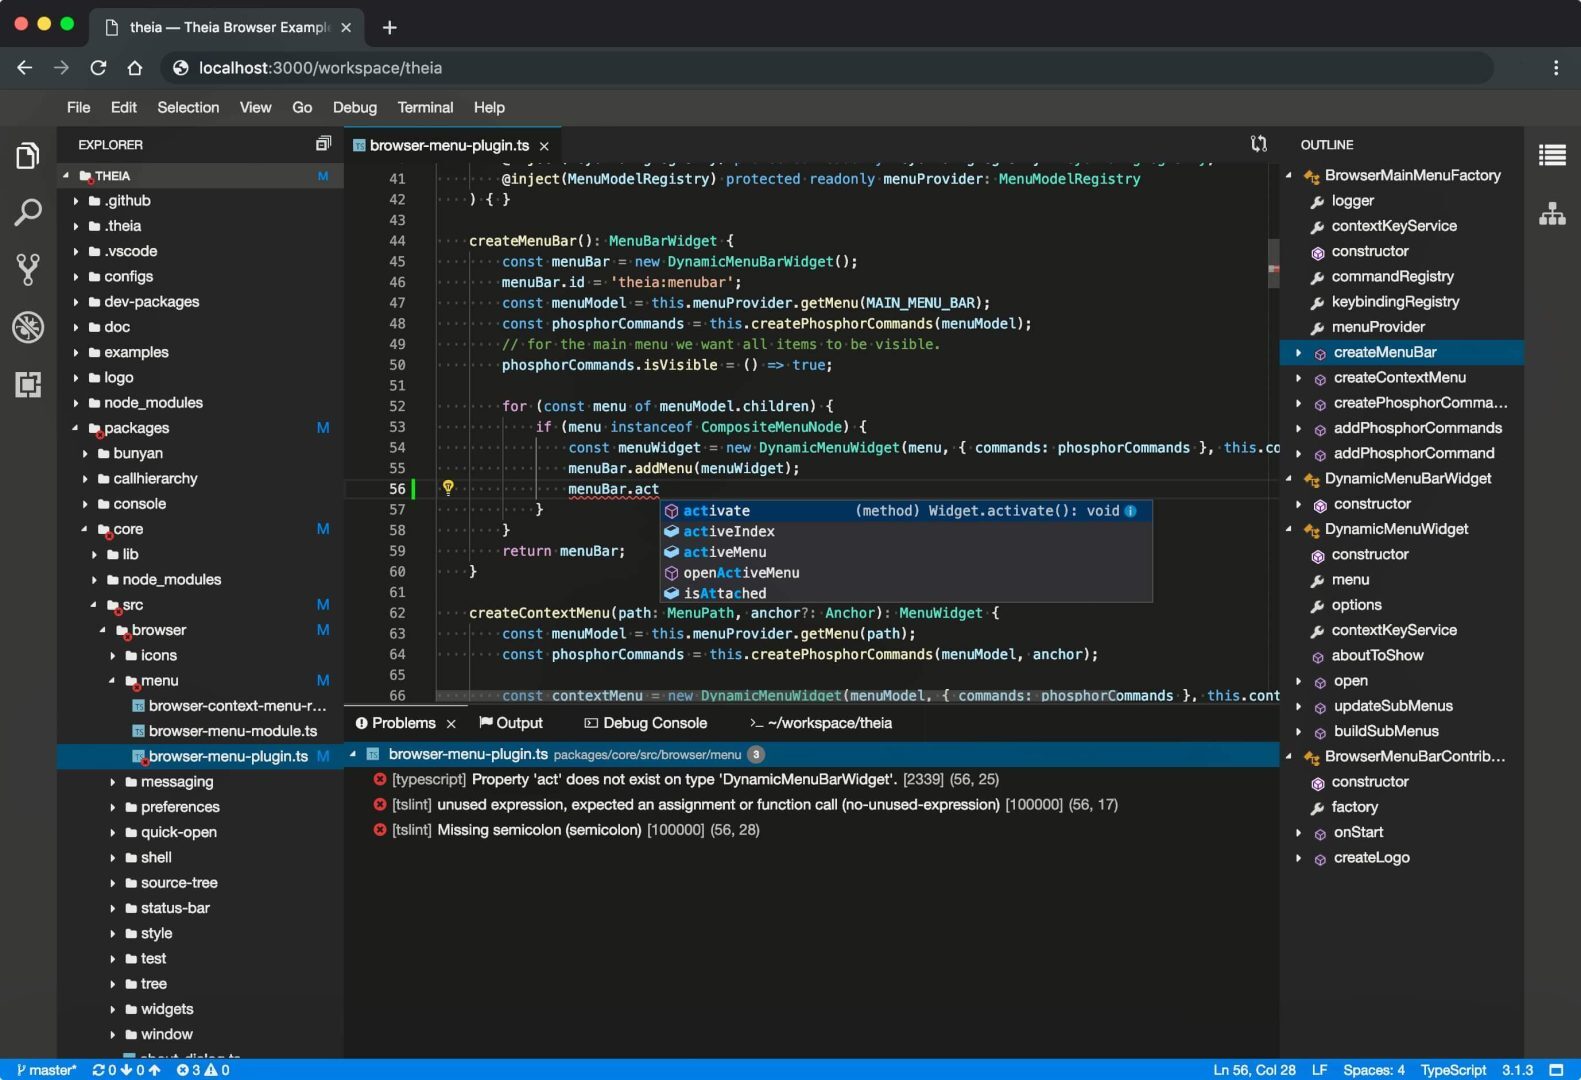
通过 attach 方法,将 widget 插入到 dom 节点中。attach 实现如下:


//@phosphor/widgets/src/widget.ts export function attach(widget: Widget, host: HTMLElement, ref: HTMLElement | null = null): void {    if (widget.parent) {      throw new Error('Cannot attach a child widget.');    }    if (widget.isAttached || document.body.contains(widget.node)) {      throw new Error('Widget is already attached.');    }    if (!document.body.contains(host)) {      throw new Error('Host is not attached.');    }    MessageLoop.sendMessage(widget, Widget.Msg.BeforeAttach);    host.insertBefore(widget.node, ref);    MessageLoop.sendMessage(widget, Widget.Msg.AfterAttach);  }
复制代码


最终调用 host.insertBefore 插入到 ref 节点前。


在之前脚手架分析中,我们最后看到 FrontendApplication 的 start 方法启动主要做了这样几件事:1、初始化并启动 frontend application contributions,2、调用 @phosphor/widgets 的 Widget.attach 方法,将 ApplicationShell 布局插入到 document.body 中 class 为 theia-preload 的节点前,3、初始化 ApplicationShell 的布局,4、隐藏启动动画,展示页面。


//@theia/core/src/browser/frontend-application.ts 
get shell(): ApplicationShell { return this._shell;}protected attachShell(host: HTMLElement): void { const ref = this.getStartupIndicator(host); Widget.attach(this.shell, host, ref);}
复制代码


其中 shell 是 ApplicationShell,接下来具体介绍一下 ApplicationShell。

ApplicationShell

Theia 整个视图布局主要包括 topPanel、leftPanel、mainPanel、rightPanel、bottomPanel 和 statusBar。


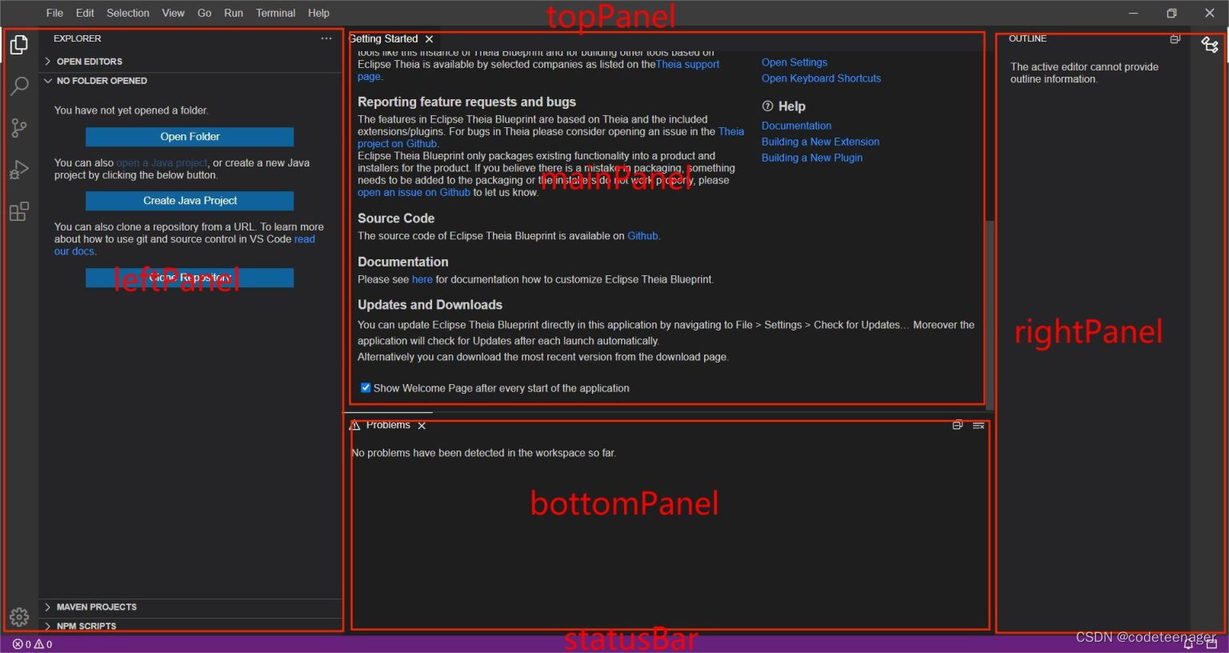
ApplicationShell 继承了 Widget,在 ApplicationShell 中分别定义了以上几个视图,在 createLayout 方法中使用 @phosphor/widgets 提供的布局容器进行组装。


//@theia/core/src/browser/shell/application-shell.ts
@injectable()export class ApplicationShell extends Widget { /** * The dock panel in the main shell area. This is where editors usually go to. */ mainPanel: TheiaDockPanel;
/** * The dock panel in the bottom shell area. In contrast to the main panel, the bottom panel * can be collapsed and expanded. */ bottomPanel: TheiaDockPanel;
/** * Handler for the left side panel. The primary application views go here, such as the * file explorer and the git view. */ leftPanelHandler: SidePanelHandler;
/** * Handler for the right side panel. The secondary application views go here, such as the * outline view. */ rightPanelHandler: SidePanelHandler;
/** * General options for the application shell. */ protected options: ApplicationShell.Options;
/** * The fixed-size panel shown on top. This one usually holds the main menu. */ topPanel: Panel;
protected initializeShell(): void { this.addClass(APPLICATION_SHELL_CLASS); this.id = 'theia-app-shell'; // Merge the user-defined application options with the default options this.options = { bottomPanel: { ...ApplicationShell.DEFAULT_OPTIONS.bottomPanel, ...this.options?.bottomPanel || {} }, leftPanel: { ...ApplicationShell.DEFAULT_OPTIONS.leftPanel, ...this.options?.leftPanel || {} }, rightPanel: { ...ApplicationShell.DEFAULT_OPTIONS.rightPanel, ...this.options?.rightPanel || {} } };
this.mainPanel = this.createMainPanel(); this.topPanel = this.createTopPanel(); this.bottomPanel = this.createBottomPanel();
this.leftPanelHandler = this.sidePanelHandlerFactory(); this.leftPanelHandler.create('left', this.options.leftPanel); this.leftPanelHandler.dockPanel.widgetAdded.connect((_, widget) => this.fireDidAddWidget(widget)); this.leftPanelHandler.dockPanel.widgetRemoved.connect((_, widget) => this.fireDidRemoveWidget(widget));
this.rightPanelHandler = this.sidePanelHandlerFactory(); this.rightPanelHandler.create('right', this.options.rightPanel); this.rightPanelHandler.dockPanel.widgetAdded.connect((_, widget) => this.fireDidAddWidget(widget)); this.rightPanelHandler.dockPanel.widgetRemoved.connect((_, widget) => this.fireDidRemoveWidget(widget));
this.layout = this.createLayout();
this.tracker.currentChanged.connect(this.onCurrentChanged, this); this.tracker.activeChanged.connect(this.onActiveChanged, this);}
/** * Assemble the application shell layout. Override this method in order to change the arrangement * of the main area and the side panels. */ protected createLayout(): Layout { const bottomSplitLayout = this.createSplitLayout( [this.mainPanel, this.bottomPanel], [1, 0], { orientation: 'vertical', spacing: 0 } ); const panelForBottomArea = new SplitPanel({ layout: bottomSplitLayout }); panelForBottomArea.id = 'theia-bottom-split-panel';
const leftRightSplitLayout = this.createSplitLayout( [this.leftPanelHandler.container, panelForBottomArea, this.rightPanelHandler.container], [0, 1, 0], { orientation: 'horizontal', spacing: 0 } ); const panelForSideAreas = new SplitPanel({ layout: leftRightSplitLayout }); panelForSideAreas.id = 'theia-left-right-split-panel';
return this.createBoxLayout( [this.topPanel, panelForSideAreas, this.statusBar], [0, 1, 0], { direction: 'top-to-bottom', spacing: 0 } ); }}
复制代码

自定义布局

以上介绍了 ApplicationShell 的组成和布局,那么我们要扩展一个 toolbar 或者 simulator 也就简单了,只需重写 ApplicationShell 的 createLayout 方法,添加自己定义的视图,然后使用 inversify 重新绑定即可。其实官方提供了一个 @theia/toolbar 的模块,也是按上述的方法去重写的。效果如图:


代码如下:


@injectable()export class ApplicationShellWithToolbarOverride extends ApplicationShell {    @inject(ToolbarPreferences) protected toolbarPreferences: ToolbarPreferences;    @inject(PreferenceService) protected readonly preferenceService: PreferenceService;    @inject(ToolbarFactory) protected readonly toolbarFactory: () => Toolbar;
protected toolbar: Toolbar;
@postConstruct() protected override async init(): Promise<void> { this.toolbar = this.toolbarFactory(); this.toolbar.id = 'main-toolbar'; super.init(); await this.toolbarPreferences.ready; this.tryShowToolbar(); this.mainPanel.onDidToggleMaximized(() => { this.tryShowToolbar(); }); this.bottomPanel.onDidToggleMaximized(() => { this.tryShowToolbar(); }); this.preferenceService.onPreferenceChanged(event => { if (event.preferenceName === TOOLBAR_ENABLE_PREFERENCE_ID) { this.tryShowToolbar(); } }); }
protected tryShowToolbar(): boolean { const doShowToolbarFromPreference = this.toolbarPreferences[TOOLBAR_ENABLE_PREFERENCE_ID]; const isShellMaximized = this.mainPanel.hasClass(MAXIMIZED_CLASS) || this.bottomPanel.hasClass(MAXIMIZED_CLASS); if (doShowToolbarFromPreference && !isShellMaximized) { this.toolbar.show(); return true; } this.toolbar.hide(); return false; }
protected override createLayout(): Layout { const bottomSplitLayout = this.createSplitLayout( [this.mainPanel, this.bottomPanel], [1, 0], { orientation: 'vertical', spacing: 0 }, ); const panelForBottomArea = new SplitPanel({ layout: bottomSplitLayout }); panelForBottomArea.id = 'theia-bottom-split-panel';
const leftRightSplitLayout = this.createSplitLayout( [this.leftPanelHandler.container, panelForBottomArea, this.rightPanelHandler.container], [0, 1, 0], { orientation: 'horizontal', spacing: 0 }, ); const panelForSideAreas = new SplitPanel({ layout: leftRightSplitLayout }); panelForSideAreas.id = 'theia-left-right-split-panel'; return this.createBoxLayout( [this.topPanel, this.toolbar, panelForSideAreas, this.statusBar], [0, 0, 1, 0], { direction: 'top-to-bottom', spacing: 0 }, ); }}
export const bindToolbarApplicationShell = (bind: interfaces.Bind, rebind: interfaces.Rebind, unbind: interfaces.Unbind): void => { bind(ApplicationShellWithToolbarOverride).toSelf().inSingletonScope(); rebind(ApplicationShell).toService(ApplicationShellWithToolbarOverride);};
复制代码


定义了 ApplicationShellWithToolbarOverride 继承自 ApplicationShell,然后创建 toolbar,并在 createLayout 方法中将 toolbar 添加进去,最后将 ApplicationShellWithToolbarOverride 绑定到容器中,然后通过 rebind 替换掉 ApplicationShell 即可。


看完觉得对您有所帮助别忘记关注呦


发布于: 刚刚阅读数: 4
用户头像

龙之幽谷

关注

还未添加个人签名 2018.02.21 加入

还未添加个人简介

评论

发布
暂无评论
Eclipse Theia技术揭秘——自定义布局_开发工具_龙之幽谷_InfoQ写作社区