
虚拟机安装 Ubuntu16 并安装 Ros(Kinetic)

@TOC
</font>
<hr style=" border:solid; width:100px; height:1px;" color=#000000 size=1">虚拟机、ubuntu16.04、ubuntu18.04,下载链接:<br>链接:https://pan.baidu.com/s/1xCsTGzQGgJvb3_sQBFcRzA提取码:4jvr 复制这段内容后打开百度网盘手机 App,操作更方便哦--来自百度网盘超级会员 V5 的分享推荐 ubuntu16.04,标定的那个在 ubuntu 在 18 有问题。
1.虚拟机安装镜像教程
参考:https://www.cnblogs.com/su1961117443/p/12419892.html或者https://www.bilibili.com/video/BV1zt411G7Vn?p=2可以安装 vmtools,界面显示窗口自适应。
2.ROS 各个版本
注:因为 ubuntu 是 16.04 的,所以这里我们安装 Kinetic 版本的 ROS.参考链接:https://blog.csdn.net/sinat_39416814/article/details/88343714
3.ROS 简单介绍
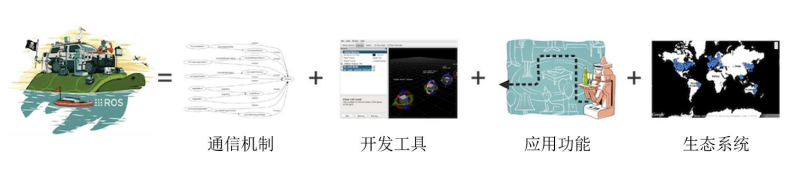
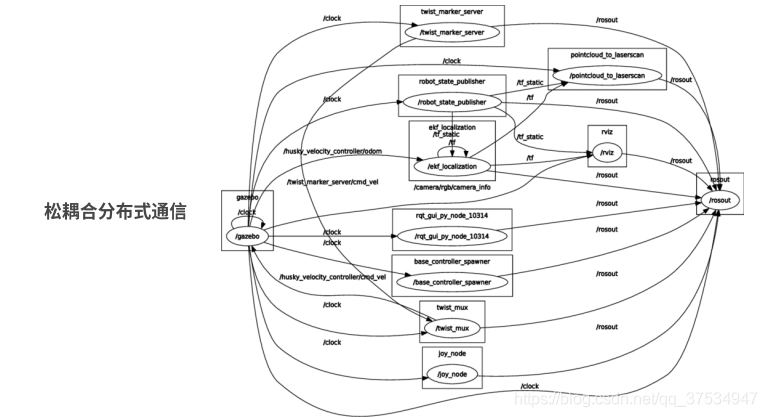
通信机制:
开发工具:
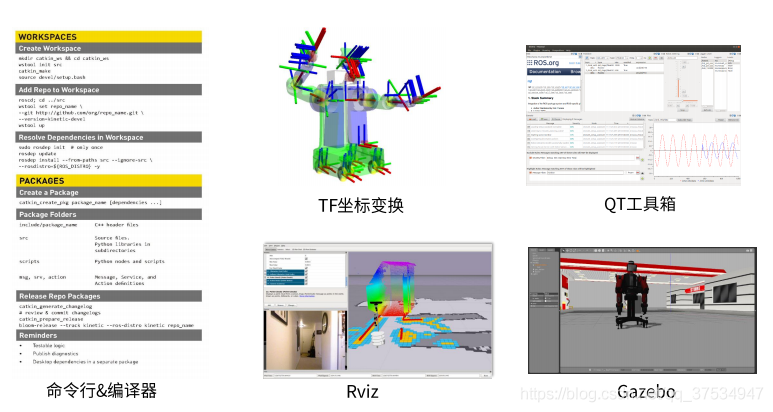
应用功能:
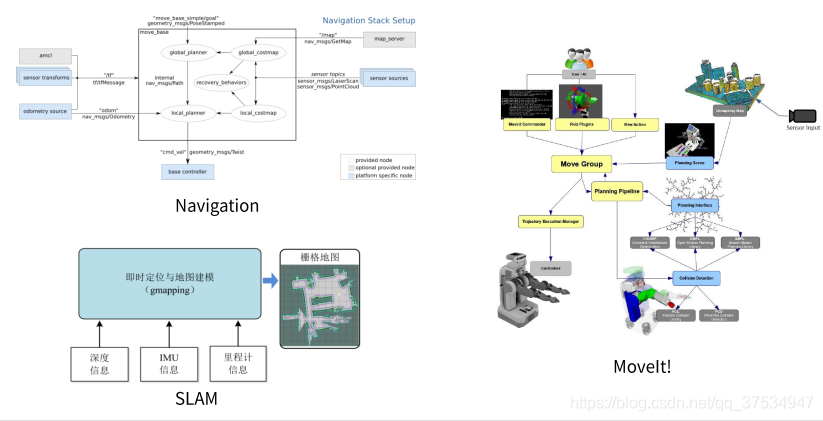
生态系统:
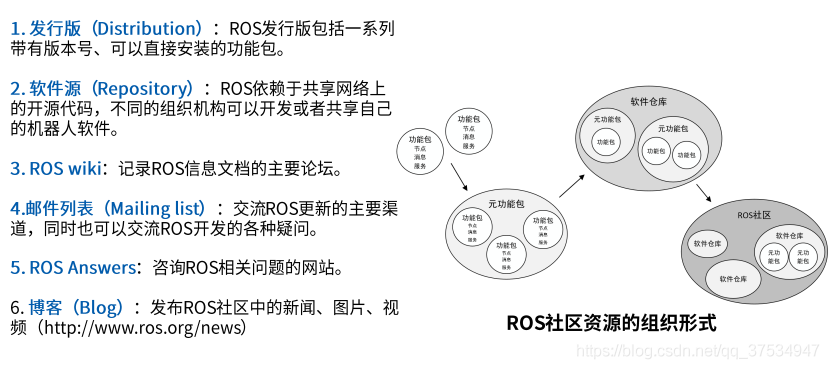
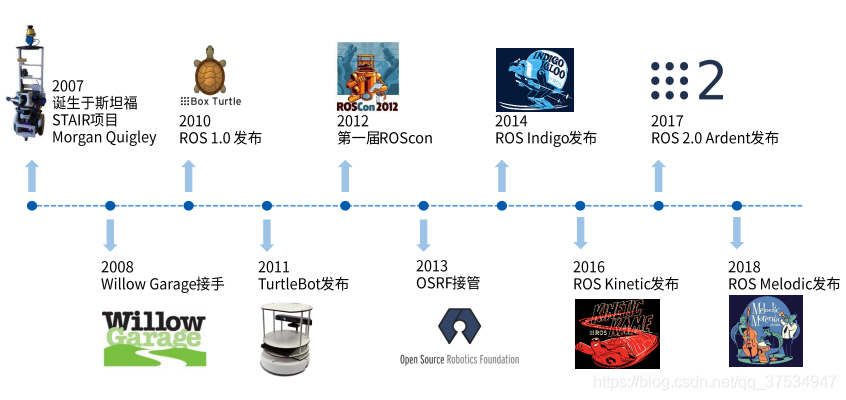
注:这些来自古月居视频内容https://www.bilibili.com/video/BV1zt411G7Vn?p=2更为详情的入门请观看其视频。
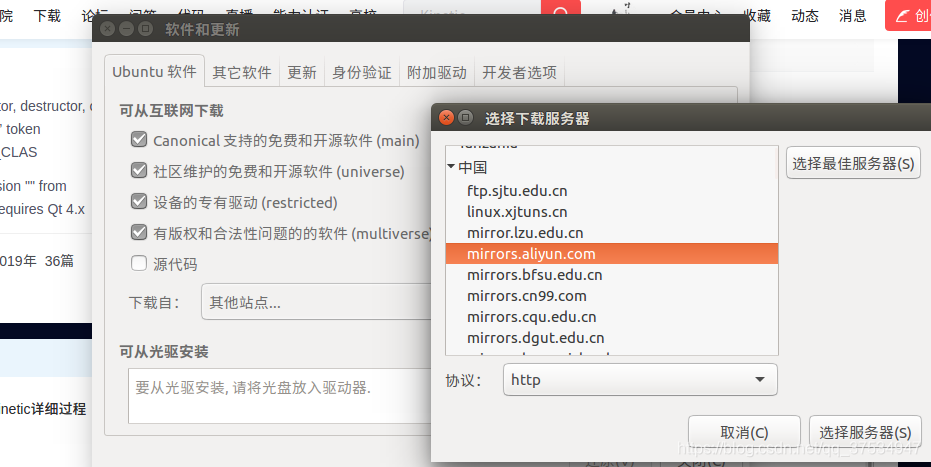
4.安装 ROS 环境——Kinetic
1)先选择下载服务器位置
这里我选择的阿里云、清华云也可以。
2)设置 sources.list

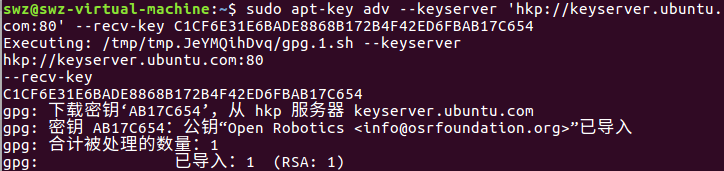
3)设置 key(公钥已更新)
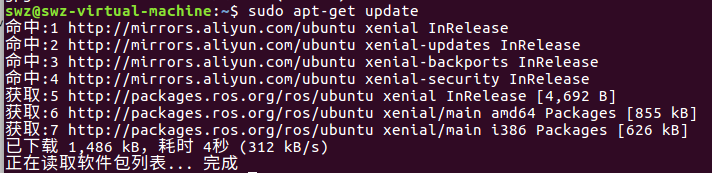
4)更新 package
5)安装 ROS kinetic 完整版
注:可能第一次安装会有个别包没有安装上,需要再次运行即可。---时间有点长!!!!
6)初始化 rosdep(问题最大处!!!)
第一步
注:这里可能会出现如下错误:错误:
原因: 由于 raw.githubusercontent.com 被墙,程序无法下载相应的文件。解决方法就是使 raw.githubusercontent.com 能够被正常访问。这个网站被墙的方式是 dns 污染,所以我们只要能够找到这个网站的正确 ip 就可以了,解决: 修改 hosts 文件 1.sudo gedit /etc/hosts2.把下面这些地址拷贝到 hosts 文件末尾,然后保存。
3.再干一件事,执行 sudo gedit /etc/resolv.conf,将原有的 nameserver 这一行注释,并添加以下两行
4.再次执行 sudo rosdep init,这次会报一个问题,就是文件已存在:
5.这时候直接删除这个文件 sudo rm /etc/ros/rosdep/sources.list.d/20-default.list,再次执行 sudo rosdep init,我至今操作过很多次,没有出现不成功的状态,如果实在不成功,试试换手机热点,多执行几次,最后输出如下信息就 OK 了:
注:其实上面一步一般可以解决问题,换手机热点挺好使的。
第二步
注:这个命令主要也是网络的问题,一般是读取超时,一般换手机热点、延长时间、以及 fq 多试试几次就可以了(这些方法参考https://www.cnblogs.com/zxzmnh/p/11758103.html),但是如果上面不行,还有一种方法,就是先下载到本地,在配置, 这个问题困扰了我两天,最后看到大佬们的解决方法,实在是妙。。。具体操作:
a.直接建在了/etc/ros/建了相应的目录。
链接: https://pan.baidu.com/s/19OCXIUgZ1RNHV33noc1auw提取码: tnn9 从上面直接下载,解压到/etc/ros 目录下。需要超级权限。
b.修改 20-default.list 脚本文件,需要超级权限。
其所在的目录是:/etc/ros/rosdep/sources.list.d/之前的内容:
现在的内容:
c.继续修改
sudo 打开/usr/lib/python2.7/dist-packages/rosdistro/init.py 这个文件,按照下面的代码进行修改。
这样我就成功了!!!!!!不容易。参考链接:https://blog.csdn.net/super_sean/article/details/105433250
7)配置 ROS 环境
8)安装依赖项
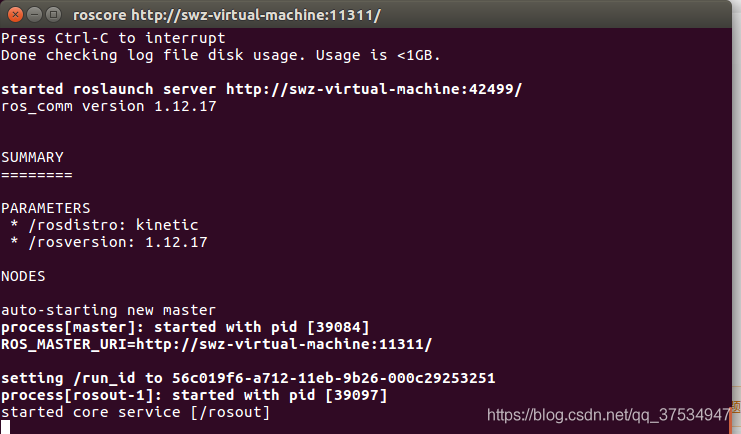
9)测试 ROS 是否安装成功
(1)CTRL+ALT+T 打开终端(Termial),输入以下命令,初始化 ROS 环境
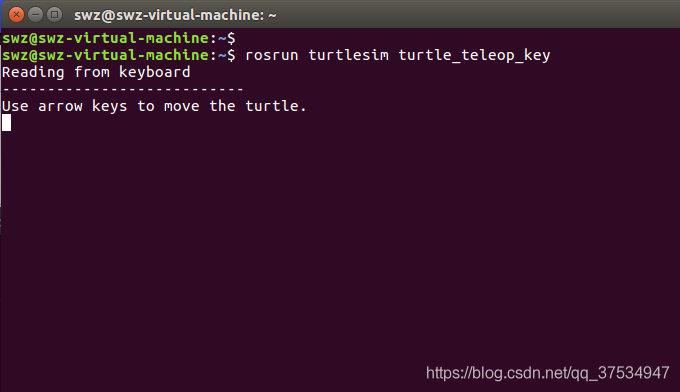
(2)再 打开一个新的终端(Termial),输入以下命令,弹出一个小乌龟窗口:
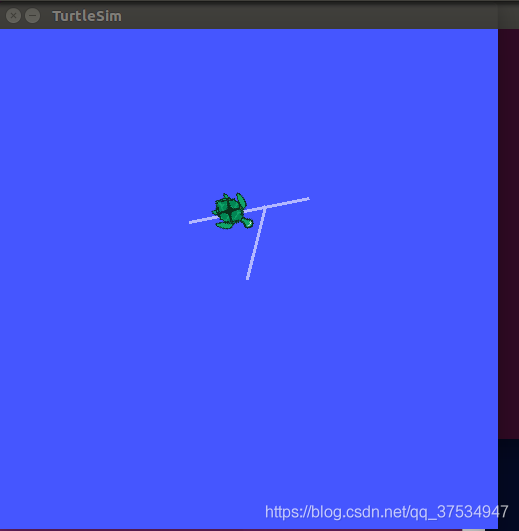
(3)出现一个小乌龟的 LOGO 后,再 打开一个新的终端(Termial),输入以下命令
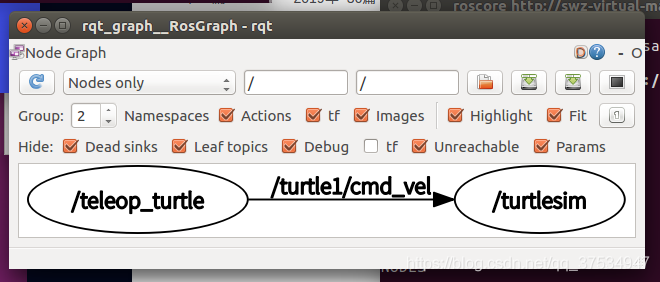
(4) 打开新的 Termial,输入以下命令,可以查看 ROS 节点信息:
5.标定包编译安装
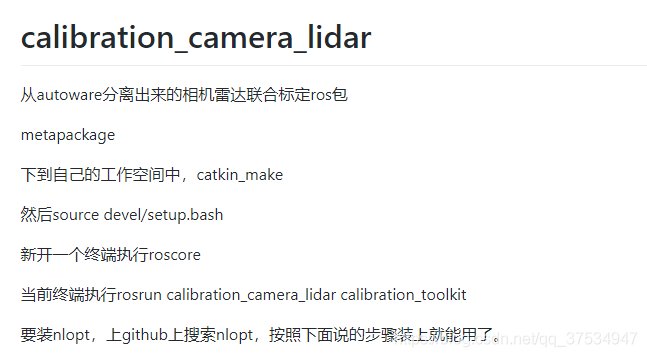
标定代码:https://github.com/XidianLemon/calibration_camera_lidar
5.1 创建 ROS 工作空间
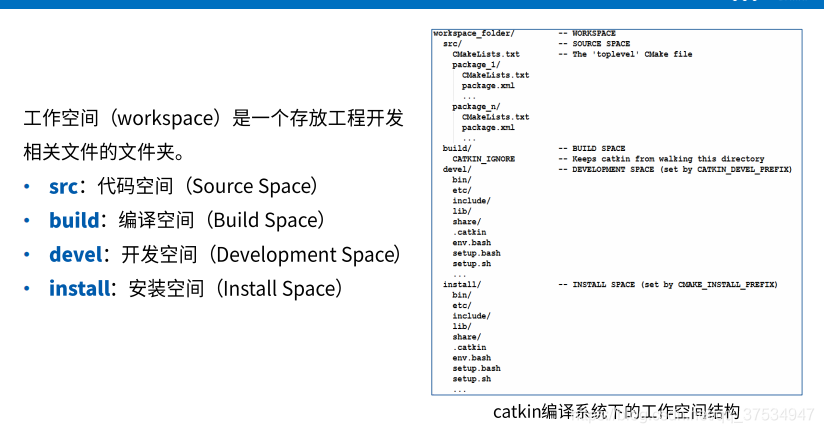
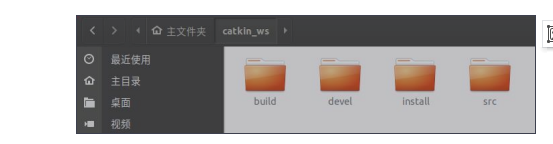
创建工作环境:mkdir -p ~/catkin_ws/srccd ~/catkin_ws/srccatkin_init_workspace 注:catkin_ws 可以任意起名字,但是 src 不可以。后面的编译工作环境这里就不用了弄了,这些操作在 5.2 编译功能包实现即可。编译工作环境:cd ~/catkin_ws/catkin_make 设置环境变量:source devel/setup.bash 检查环境变量:echo $ROS_PACKAGE_PATH
注:这部分可以参考https://www.bilibili.com/video/BV1zt411G7Vn?p=9
5.2 编译功能包
将下面代码https://github.com/XidianLemon/calibration_camera_lidar
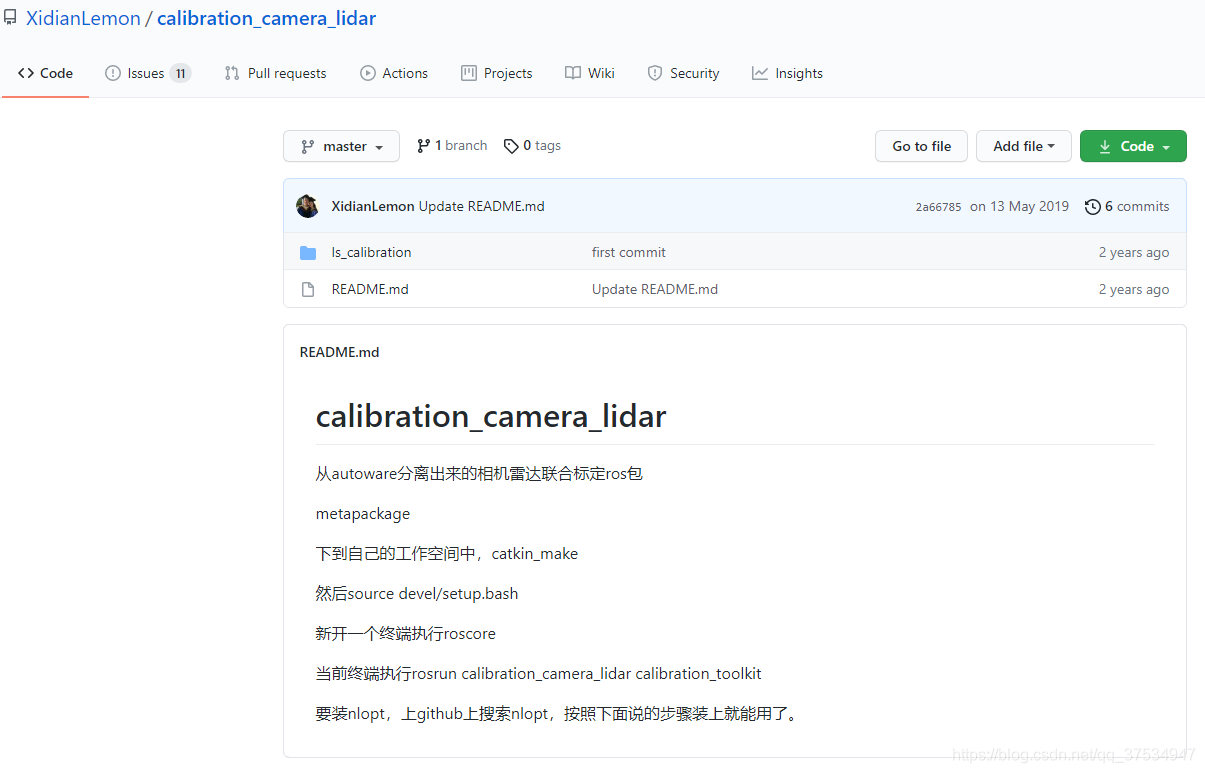
下载到本地,这部分代码就是标定的功能包,所以不需要自己创建功能包了,直接使用编译即可,在前面我们已经创建好了工作环境 catkin_ws,接下来将解压后的代码文件夹 Is_calibration 放到 src 文件下,然后返回到 catkin_ws 路径下,重新编译:catkin_make,报一下错
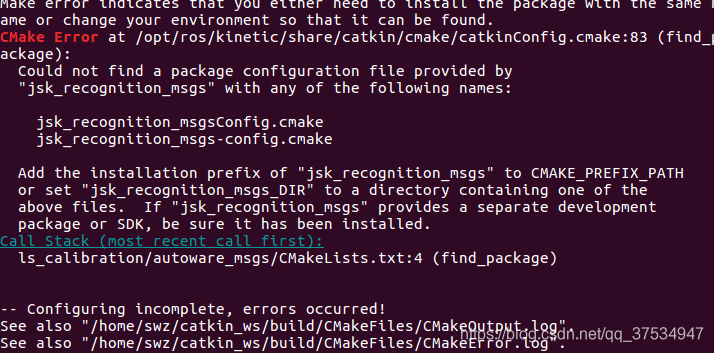
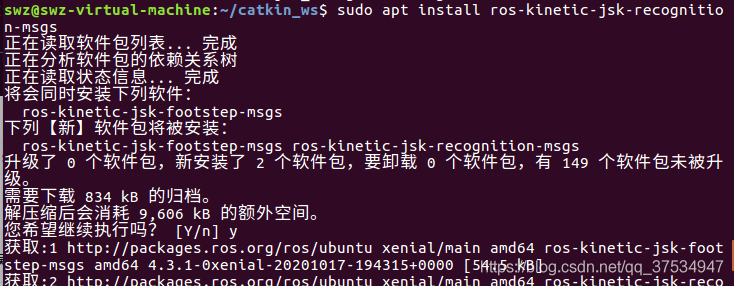
解决: sudo apt install ros-kinetic-jsk-recognition-msgs
安装 nlopt:https://github.com/stevengj/nlopt
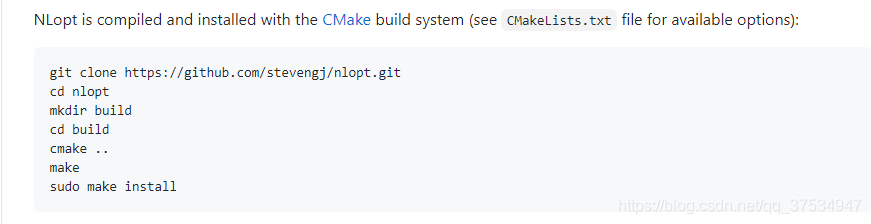
按照其步骤走一遍,即可。
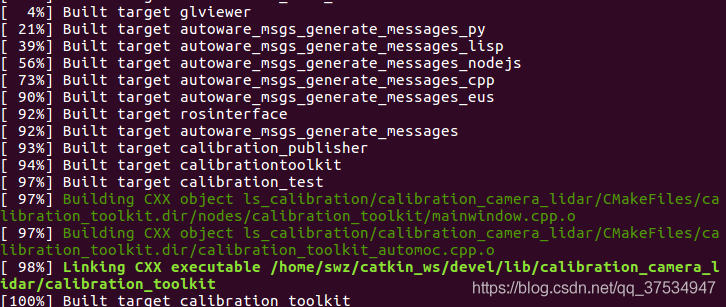
重新编译: catkin_make
运行:一个终端:
另一个终端:
成功:

其他问题:
1:/home/qian/anaconda3/lib/libpng16.so.16: undefined reference to `inflateValidate@ZLIB_1.2.9'
解决: 直接删除 anaconda3,因为冲突!!!!
参考链接:https://blog.csdn.net/qq_34213260/article/details/107423121
2:编译内存不足
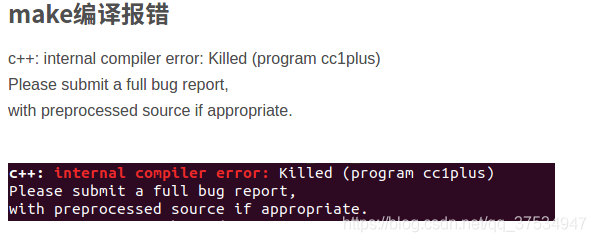
解决方法:虚拟机配置增加内存容量,这里我将 2G 提高我 3G 可以了。有时候多试几遍也可以,因为计算机的内存可能还没来得及清理,所以导致这时候的内存比较大。
3.rosrun calibration_camera_lidar calibration_toolkit 报错
home/x/catkin_ws/devel/lib/calibration_camera_lidar/calibration_toolkit: error while loading shared libraries: libnlopt.so.0: cannot open shared object file: No such file or directory 这是因为链接问题(因为 libnlopt.so.0 的链接位置不对)解决:
在 libnlopt.conf 文件中添加内容为:/usr/local/lib,最后使配置生效:
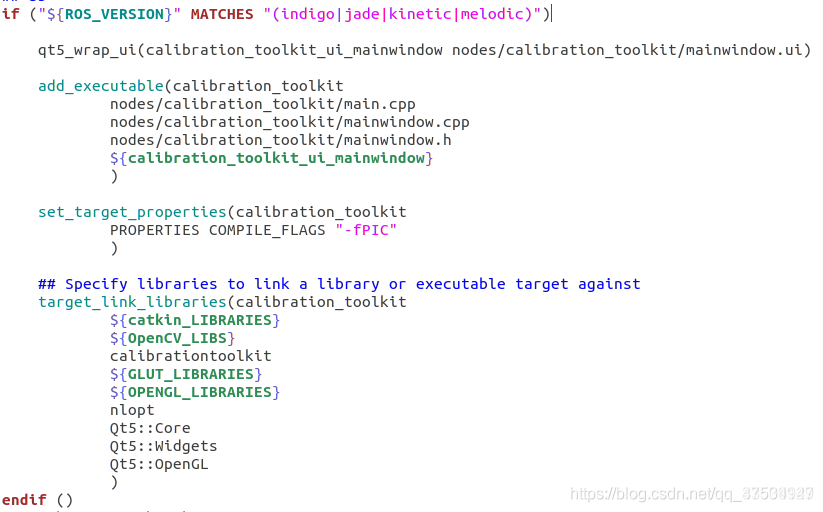
4.如果想安装 18.04 的 ubuntu 以及 melodic-ROS
因为 autoware1.14 只能在 ubuntu18.04 上安装并且依赖于 ROS melodic,因此需要对 calibration_camera_lidar 功能包下的 CMakeLists.txt 进行修改,把所有的
改成:
因为这里使用了条件编译,默认不支持 ROS melodic。
6、Autoware 的一些说明
历史版本简要回顾:
v1.2.0 支持 ROS Kinetic 版本,用于激光雷达追踪的 kalman 滤波,基于 yolo_v2 视觉跟踪,增加 imu 驱动,为 NDT 定位增加 IMU 和里程计选项,点云距离滤波,rosbag 数据预处理;
v1.3.0 增加基于 A*算法的避障,GPU 的欧式聚类,基于 DNN 的交通灯识别;
v1.4.0 增加点云的地面滤波;
v1.5.0 增加 Web-Ui,多斑马线检测器,ENet 图像语义分割,开始支持 aarch64 架构,支持 NVIDIA DrivePX2,为 A*路径规划算法增加虚拟障碍物仿真;
v1.6.0 增加 GPU-NDT 匹配算法,可以控制一些机动车了,新的 Rviz 模型,增加了 ray 地面滤波(也就是多线激光雷达的点云地面滤波),增强了 DecisionMarker,基于规则控制机动车,存在激光雷达旋转时 NDT 匹配算法不工作的问题;
v1.7.0 支持定位多种交通标志,支持 IDS-imaging 相机,支持北阳 2D 雷达,增加了多雷达标定工具,相机-雷达联合标定工具,支持 Velodyne 的 32 线激光雷达,支持 AVT 相机,基于 MxNet 的信号灯识别,增加 yolo-v3 检测器,增加了车辆状态节点和话题,NDT 匹配算法的安全监视器,基于 IMM-UKF-PDA 的多目标跟踪算法,路径点速度重规划工具;
v1.8.0 开始有相应的 demo 视频公布在油管;新功能:视觉检测与点云检测的信息融合(YOLOV3)和数据融合(点云着色),为 Nvidia Drive PX2 和其他 aach64 架构提供交叉编译,支持西克 Sick 的 LD-MRS 激光雷达,点云地图的网格划分,现在可以限制 NDT 建图算法的最大扫描距离了;一些提升:欧式聚类区分点云更精确,最多支持 8 个激光雷达,加速 point2image(应该是用了 OpenMP 提速)
v1.9.0 开始逐步弃用 ROS indigo 版本,基于简单的运动估计来估计物体运动,点云地图中静态目标的过滤(应该是和预建地图做差分),L-shape 拟合稳定跟踪多辆车,速腾雷达驱动,无需英伟达的 sdk 也可以交叉编译
v1.10.0 不再支持 ROS indigo,可以过滤掉离自身车辆较远的点云,增加 FLIR ADK 相机驱动,Ouster 激光雷达驱动
v1.11.0 catkin 不再支持编译源码,改用 colcon;点云快速编码用于目标检测,百度的 CNN 用于点云分割,基于点云的外形/姿态估计;改进的混合 A*算法和代价图;
v1.12.0 v1.13.0 v1.14.0 都未有说明https://blog.csdn.net/qq_27493341/article/details/106646054
版权声明: 本文为 InfoQ 作者【Studying_swz】的原创文章。
原文链接:【http://xie.infoq.cn/article/6120bdf1ba56fbf437bdbc379】。文章转载请联系作者。

还未添加个人签名 2020-12-23 加入
还未添加个人简介


评论