前言
Android 上的文件管理混乱一直是诟病,用户也基本上看着 Android 文件管理器的文件头疼,乱七八糟,随便一个 app 就在根目录上生成文件,虽然这方便了开发人员,但是对用户来说这些文件根本是无用的,而且用户也不关心这个文件是做什么的,所以 Google 在 Android10 上做出了改进,Android10 文件管理 跟 iOS 系统文件管理看齐,采用类似的沙盒机制。
背景
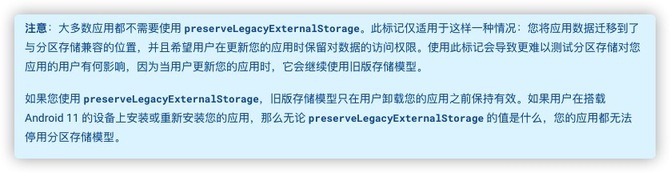
最近升级了 build.gradle 文件中的 targetSdk 从 28 升到 29 了,测试人员在测试拍照图片选择时,Android10 上出现了 crash,网上搜索上大部分说是在 AndroidManifest.xml 中 application 标签中添加 android:requestLegacyExternalStorage="true", 就选择退出分区存储,应用就可以继续运行了,但是这是个取巧的方法,在 Android11 上这个方法就失效了,官网上也给出一个解决方案改用 preserveLegacyExternalStorage =“true”,也是可以的,但是还是要注意重新安装的应用,
为了以后能有更好的体验还是要去解决分区存储模型的使用。
排查的的过程
前提
APP 上权限都是正确的,Matisse 版本是 0.5.3-beta3.
排查
我这边首先出现的是报错是:
java.lang.NullPointerException
空指针异常,在报错路径中,找到了报错地方 Matisse.obtainPathResult(data) 返回 list 里面为空了,无法保存拍照的图片位置了,在 GitHub--Matisse 库中 issue 中找到了同样的一些问题,根据说法还是因为 Android10 上做了分区储存限制,媒体文件共享合集,Android10 上拍照要用 uri 加载图片了,解决方法是在
MediaStoreCompat 类中加一些方法
MediaStoreCompat类 之前....public void dispatchCaptureIntent(Context context, int requestCode) {      ....        if (captureIntent.resolveActivity(context.getPackageManager()) != null) {            File photoFile = null;            try {                photoFile = createImageFile();            } catch (IOException e) {                e.printStackTrace();            }         ....        }    }.....    修改后   public void dispatchCaptureIntent(Context context, int requestCode) {      ....        if (captureIntent.resolveActivity(context.getPackageManager()) != null) {            if (Build.VERSION.SDK_INT >= android.os.Build.VERSION_CODES.Q) {                mCurrentPhotoUri = createImageUri(context);            } else {                File photoFile = null;                try {                    photoFile = createImageFile(context);                } catch (IOException e) {                    e.printStackTrace();                }           ....            }        }    }
    private Uri createImageUri(Context context) {        String status = Environment.getExternalStorageState();        if (status.equals(Environment.MEDIA_MOUNTED)) {
            return context.getContentResolver().insert(MediaStore.Images.Media.EXTERNAL_CONTENT_URI, new                    ContentValues());        } else {            return context.getContentResolver().insert(MediaStore.Images.Media.INTERNAL_CONTENT_URI, new                    ContentValues());        }    }
复制代码
这样拍照就能用了,就能在 Android10 上获取 uri 了,这个不能获取到 path,这样就能愉快的拍照了,但是还没完,在预览图片的时候有可能出现应用 ANR,应用无反应卡死,在 GitHub--Matisse 库中 issue 中也找到了同样的一些问题,经过断点调试发现了原因 getBitmapBound() 方法中 decodeStream 大文件耗时太久了
PhotoMetadataUtils类
之前 public static Point getBitmapBound(ContentResolver resolver, Uri uri) {       ...            BitmapFactory.Options options = new BitmapFactory.Options();            options.inJustDecodeBounds = true;            is = resolver.openInputStream(uri);            BitmapFactory.decodeStream(is, null, options);       ...    }

之后public static Point getBitmapBound(ContentResolver resolver, Uri uri) {            ...            BitmapFactory.Options options = new BitmapFactory.Options();            options.inJustDecodeBounds = true;
            is = new FileInputStream(uri.getPath());;            options.inPreferredConfig = Bitmap.Config.RGB_565;            options.inPreferQualityOverSpeed = false;            BitmapFactory.decodeFileDescriptor(is.getFD(), null, options);            ...    }
复制代码
可以看出,改用了 decodeFileDescriptor 方法,并降低了图片质量。这样 Matisse 上的问题应该是解决了。但是在业务上我需要压缩图片并上传,在压缩上就出现问题了,Android10 上是不允许去访问别的应用图片的。
BitmapUtil压缩类
之前public static String compressImage(String filePath) {        ...        //原文件        File oldFile = new File(filePath);       //压缩文件路径 照片路径/        String targetPath = oldFile.getPath();        ...} 之后
public static Uri compressImage(Context context, Uri fileUri) {        ...         ParcelFileDescriptor parcelFileDescriptor = null;        //原文件        try {            parcelFileDescriptor = context.getContentResolver().openFileDescriptor(fileUri            , "r", null);        } catch (FileNotFoundException e) {            e.printStackTrace();        }        if (parcelFileDescriptor == null) {            return fileUri;        }        FileDescriptor fileDescriptor = parcelFileDescriptor.getFileDescriptor();        FileInputStream inputStream= new FileInputStream(fileDescriptor);
        File file = new File(context.getCacheDir(),        ImageUtil.getImageAbsolutePath(context, fileUri));        FileOutputStream outputStream = null;        try {             outputStream=new FileOutputStream(file);        } catch (FileNotFoundException e) {            e.printStackTrace();        }        IOUtils.Copy(inputStream,outputStream);        Logger.d(file.length());        //压缩文件路径 照片路径/        String targetPath = file.getPath();        ...}
复制代码
这里主要是改用了 FileDescriptor,把图片复制到应用缓存中,然后在缓存中压缩文件,需要注意的是 IOUtils.Copy()方法 实现推荐用 FileChannel ,我开始使用的是 while 循环读取的实现,但是 Glide 一直报错,在列表不显示我选择的图片,
setDataSource failed: status = 0xFFFFFFEA in setDataSource()
先去 glide 官方 GitHub 上找找原因,无果,开始打印复制过来的 file 的字节大小,说明也有,然后用 Android studio 的 Device File Explorer 工具找到了应用缓存中复制的 file 图片文件,下载出来是空字节,就尝试用了 FileChannel 实现,就完成了。
结束
上面可能有些说法不对,或理解错误的地方,大牛轻拍 = =,还有就是文章上有什么布局,结构上,措辞上的做得不够好的地方,希望大家能给点意见。


评论 (4 条评论)